Wednesday, December 28, 2011

New York-Style Crumb Cake


It's been a long time since I had crumb cake. I can't think of a time if I ever baked one. I usually get the one from Entemann's and there cakes are pretty good. But since I love baking and always love trying out new recipes I decided to give this New York-Style Crumb Cake a try. It's definitely a plus that I'm a true New Yorker and I know how we love our crumb cakes! Extra crumby! lol Okay that was corny anyways...


This recipe calls for cake flour. I didn't have any on hand and I didn't want to go out in this freezing cold 26 degree weather in Elmira N.Y. So I used all-purpose flour. I know I wasn't suppose too but I just really wanted crumb cake with my coffee. So I made it with the flour and yes it did come out dry but besides that it was very delicious. I definitely will be giving this recipe another try with the cake flour. I had a piece with hot cocoa last night and a piece for breakfast!

Enjoy!

**Update**


I gave this recipe another try but this time with cake flour, and omg it taste so much better. It came out so moist not dry. So if you decide to give this recipe a go please us the cake flour, it makes a big differences!


New York-Style Crumb Cake

Source: Cooks’ Illustrated free iPhone app and Cooks’ Illustrated May 2007
Don’t be tempted to substitute all-purpose flour for the cake flour, as doing so will make a dry, tough cake. If you can’t find buttermilk, you can substitute an equal amount of plain, low-fat yogurt. When topping the cake, take care to not push the crumbs into the batter. This recipe can be easily doubled and baked in a 13 by 9-inch baking dish. If doubling, increase the baking time to about 45 minutes. Cooled leftovers can be wrapped in plastic wrap and stored at room temperature for up to 2 days.

For the Crumb Topping:
1/3 cup granulated sugar (2 2/3 ounces)
1/3 cup dark brown sugar (2 2/3 ounces)
3/4 teaspoon ground cinnamon
1/8 teaspoon table salt
8 tablespoons unsalted butter (1 stick), melted and still warm
1 3/4 cups cake flour (7 ounces)

For the Cake:
1 1/4 cups cake flour (5 ounces)
1/2 cup granulated sugar (3 1/2 ounces)
1/4 teaspoon baking soda
1/4 teaspoon table salt
6 tablespoons unsalted butter (3/4 stick), cut into 6 pieces, softened but still cool
1 large egg
1 large egg yolk
1 teaspoon vanilla extract
1/3 cup buttermilk
Confectioners’ sugar for dusting

To make the topping: Whisk sugars, cinnamon, salt, and butter in medium bowl to combine. Add flour and stir with rubber spatula or wooden spoon until mixture resembles thick, cohesive dough; set aside to cool to room temperature, 10 to 15 minutes.

To make the cake: Adjust oven rack to upper-middle position and heat oven to 325 degrees. Cut 16-inch length parchment paper or aluminum foil and fold lengthwise to 7-inch width. Spray 8-inch square baking dish with nonstick cooking spray and fit parchment into dish, pushing it into corners and up sides; allow excess to overhang edges of dish.

In bowl of standing mixer fitted with paddle attachment, mix flour, sugar, baking soda, and salt on low speed to combine. With mixer running at low speed, add butter one piece at a time; continue beating until mixture resembles moist crumbs, with no visible butter chunks remaining, 1 to 2 minutes. Add egg, yolk, vanilla, and buttermilk; beat on medium-high speed until light and fluffy, about 1 minute, scraping once if necessary.

Transfer batter to baking pan; using rubber spatula, spread batter into even layer.  Break apart crumb topping into large pea-sized pieces between your thumb, pointer, and middle fingers and spread in even layer over batter, beginning with edges and then working toward center. Bake until crumbs are golden and wooden skewer inserted into center of cake comes out clean, 35 to 40 minutes. Cool on wire rack at least 30 minutes. Remove cake from pan by lifting parchment overhang. Dust with confectioners’ sugar just before serving.


Tuesday, December 20, 2011

Cinnamon Buns


It has been a long time since I last tasted these. Boy I'm glad I made these again!

These cinnamon buns were so yummy and the glaze was the best bun glaze I've made by far. The cream cheese adds a richness to the whole bun. Since I  made these for my very close friends I didn't add the raisins, since they don't like them very much. But I love raisins so next time I'm adding raisins to half of the cinnamon buns. I just love plump raisins. ^_^ You can plump your raisins in boiling hot water for 10 minutes.

This is what they look like out the oven without the glaze. I like them warm out the oven so I couldn't wait 10 minutes to bite into one so I just had one right away.


Great treat to make for breakfast. The smell of these babies will wake your whole family up and maybe your neighbors too!

Recipe Below!

Enjoy!

Cinnamon Buns
Source: adapted from Peter Reinhart, The Bread Baker’s Apprentice & Smells Like Home
Makes 8-12 large or 12-16 smaller buns

6 1/2 tablespoons (3.25 ounces) granulated sugar
1 teaspoon salt
5 1/2 tablespoons (2.75 ounces) shortening or unsalted butter, room temperature
1 large egg, slightly beaten
1 teaspoon lemon extract or zest
3 1/2 cups (16 ounces) unbleached bread or all-purpose flour
2 teaspoons (.22 ounce) instant yeast
1 1/8 to 1 1/4 cups (9 to 10 ounces) whole milk or buttermilk, room temperature
2 tablespoons unsalted butter, melted and cooled slightly
1/2 cup (4 ounces) cinnamon sugar (6 1/2 tablespoon granulated sugar plus 1 1/2 tablespoons cinnamon)
1 cup raisins

Directions:

In a standing mixer fitted with the paddle attachment, cream the sugar, salt and shortening on medium-high speed. Whip in the egg and lemon extract until smooth. Then add the flour, yeast, and milk. Mix on low speed until the dough forms a ball. Switch to the dough hook, and increase the speed to medium, mixing for approximately 10 minutes, or until the dough is tacky but not sticky. Lightly oil a large bowl and transfer the dough to the bowl, rolling it around to cover it with oil. Cover bowl with plastic wrap.

Ferment at room temperature for approximately 2 hours, or until the dough doubles in size.

Mist the counter with spray oil, and transfer the dough to the counter. Roll out the dough with a rolling pin, lightly dusting the top of the dough with flour. Roll it into a rectangle about 2/3 inch thick and 14 inches wide by 12 inches long for larger buns, or 18 inches wide by 9 inches long for smaller buns. Brush melted butter over the dough then sprinkle the cinnamon sugar over the surface of the dough.  Sprinkle on the raisins and gently press them into the cinnamon-sugar. Roll the dough up into a log, creating a spiral as you roll. With the seam side down, cut the dough into 8 to 12 even pieces, each about 1 3/4 inches thick for larger buns; or 12 to 16 pieces each 1 1/4 inch thick for smaller buns.

Line 1 or more sheet pans with baking parchment. Place the buns approximately 1/2 inch apart.

Proof at room temperature for 75 to 90 minutes, or until the pieces have grown into one another and have nearly doubled in size.

Preheat the oven to 350 degrees F with the oven rack on the middle shelf.

Bake the buns for 20 to 30 minutes, or until golden brown.

Cool the buns in the pan for about 10 minutes, and then glaze the tops. Remove the buns from the pans, and place them on a cooling rack. Wait at least 20 minutes before serving.

Cinnamon Bun Glaze
source: adapted from Molly Wizenberg, “Bon Appetit”(March 2008) 

4 ounces cream cheese, room temperature
1 cup powdered sugar
1/4 cup (1/2 stick) unsalted butter, room temperature
1/2 teaspoon vanilla extract
In a standing mixer fitted with a paddle attachment, combine cream cheese, powdered sugar, butter and vanilla. Spread glaze on rolls.

Chocolate Crackles


One of many favorite!

This chocolate cookie recipe is one of my faves and many others have said it was there's. Chocolate Crackles are really festive for the holiday season. You can even gift wrap them and give them out as Christmas treats.

My friends & family comment saying they taste like mini brownies, and they do. Great with a tall glass of milk.

Recipe Below!

Enjoy!

Chocolate Crackles
Ingredients:

8 oz bittersweet chocolate, finely chopped
1 1/4 cups all-purpose flour (2 1/2 cups @8500 ft.)
1/2 cup unsweetened Dutch-process cocoa powder
2 tsps baking powder (1 1/2 tsps @8500 ft.)
1/4 tsp coarse salt (1/2 tsp @8500 ft.)
1/2 cup (4 oz.) unsalted butter, room temperature
1 1/2 cups light brown sugar, packed (1 1/4 cups @8500 ft.)
2 large eggs
1 tsp vanilla extract (2 tsps @8500 ft.)
1/3 cup whole milk
1 cup granulated sugar
1 cup powdered sugar

Directions:  

Melt the chocolate in a heatproof bowl over a hot water bath or on medium-low power in a microwave, stirring occasionally. Set aside to let cool. 

Sift (or whisk) the flour, cocoa, baking powder, and salt together in a bowl. 

Beat the butter and light brown sugar together for a couple of minutes until fluffy. Beat in the eggs and vanilla, then beat in the melted chocolate. Slowly mix half of the flour into the butter mixture. Mix in half of the milk until incorporated. Mix the remaining flour and then the milk until combined. 

Place the dough in the refrigerator for a minimum of 2 hours or until the dough is firm. 

Preheat the oven to 350°F. 

Pinch off pieces from the dough and roll into 1-inch balls. Coat each dough ball in granulated sugar then in powdered sugar and place 2 inches apart on a parchment-lined baking sheet. Bake until the surfaces crack – about 14 minutes (10 minutes @8500 ft.). You can rotate the baking sheets halfway through the baking time, but I didn’t need to.

Remove from baking sheets to cooling racks until completely cooled. Store cookies between layers of parchment or wax paper in airtight containers at room temperature. Good for up to 3 days. Makes 60 cookies.

Source: from Martha Stewart’s Cookies & Use Real Butter

Coconut Custard Pie


I think two days of baking is catching up to me! My body was killing me last night, so I slept like a baby and didn't get up till 9:30am. Well good thing is I feel well rested today! ^_^

Every Thanksgiving I bake for my family and my boyfriends family, so that's a lot of baking...lol My mom wanted me to bake her pumpkin pie and coconut custard so I did. I got this recipe from Allrecipes.com.

This pie was super yummy and creamy, everyone loved this pie better than the pumpkin pie. I didn't make the crust, it was a frozen one. I didn't like the crust so much, so I think next time I will make this I will make my own pie crust.

Enjoy!

Coconut Custard Pie IV

Ingredients: 
1 (9 inch) pie crust, baked
4 eggs
1/2 cup white sugar
1/8 teaspoon salt
1 pinch ground nutmeg
1 1/2 teaspoons vanilla extract
1 cup whole milk
1 cup evaporated milk
1/2 cup whipping cream
1 cup shredded coconut

Directions:  
Preheat oven to 350 degrees F (175 degrees C). 

In a large mixing bowl beat eggs slightly. Add sugar, salt, nutmeg, and vanilla extract. Mix well. Gently whisk in whole milk, evaporated milk, and cream. Fold in coconut. Pour mixture into baked pie shell. 

Bake in preheated oven for 30 to 40 minutes, or until toothpick inserted in center comes out clean. Cool before serving, and refrigerate within 1 hour. 


Pumpkin Snickerdoodles


Last but not lease on the pumpkin baking marathon!

Pumpkin Snickerdoodles! These are super yummy and they go quick at my house with my growing brothers...haha This recipe will make a lot of cookies and I used a big ice cream scoop and cut that in half to make this recipe, and at that it still made a really big cookie!

This makes a really big batch so share them with friends and family! I had enough to share with two families!

    
I love baking with spices cause the house starts to smell like the Holidays! Can't wait to bake some sugar cookies! ^_^ 
  
Recipe Below!

Enjoy!
Pumpkin Snickerdoodles
Printer-Friendly Version
Yield: about 3-4 dozen cookies  Ingredients:

For the cookies:
3¾ cups all-purpose flour
1½ tsp. baking powder
½ tsp. salt
½ tsp. ground cinnamon
¼ tsp. ground nutmeg
1 cup (2 sticks) unsalted butter, at room temperature
1 cup granulated sugar
½ cup light brown sugar
¾ cup pumpkin puree
1 large egg
2 tsp. vanilla extract

For the coating:
½ cup granulated sugar
1 tsp. ground cinnamon
½ tsp. ground ginger
Dash of allspice

Directions:

In a medium bowl, combine the flour, baking powder, salt, cinnamon, and nutmeg.  Whisk to blend and set aside.  In the bowl of an electric mixer, beat together the butter and sugars on medium-high speed until light and fluffy, 2-3 minutes.  Blend in the pumpkin puree.  Beat in the egg and vanilla until incorporated.  With the mixer on low speed add in the dry ingredients and mix just until incorporated.  Cover and chill the dough for at least 1 hour.

Preheat the oven to 350˚ F.  Line baking sheets with silicone baking mats or parchment paper.  Combine the sugar and spices for the coating in a bowl and mix to blend.  Scoop the dough (about 2½ tablespoons) and roll into a ball.  Coat the dough ball in the sugar-spice mixture and place on the prepared baking sheet.  Repeat with the remaining dough to fill the sheets, spacing the dough balls 2-3 inches apart.  Dip the bottom of a flat, heavy-bottomed drinking glass in water, then in the sugar-spice mixture, and use the bottom to flatten the dough balls slightly.

Recoat the bottom of the glass in the sugar-spice mixture as needed.

Bake the cookies for 10-12 minutes, or until just set and baked through.  Let cool on the baking sheets about 5 minutes, then transfer to a wire rack to cool completely.  Repeat with the remaining dough.  Store in an airtight container.

Source: Annies-Eats

Dairy-Free, Soy-Free Pumpkin Pie


My boyfriend is lactose intolerance and he also loves pumpkin pie so you know I had to go on a hunt and find my boy a dairy free pumpkin pie. Well it didn't take me long to find one! ^_~

I didn't want to to post this until he had a piece or two. So far so good he didn't feel sick while eating this so he had another piece...lol I did make this with eggs which he is allergic too, but I only used the whites not yolks. He doesn't seem to get sick when eating the egg whites plus he takes his lactose pills before eating anything with dairy in it.
 
Anyways I also had a piece and it was very delicious! He tells me that it was a little sweeter than the regular way I bake pumpkin pie but he didn't get sick and it didn't feel so heavy on the stomach.
 
I didn't have time to make my own pie crust this year, so I bought the frozen pie crust.
Recipe Below!
Enjoy!

Dairy-Free, Soy-Free Pumpkin Pie

1/2 Cup Brown Sugar, firmly packed
1/4 Cup White Sugar
1 Teaspoon Ground Cinnamon
1/2 Teaspoon Ground Ginger
1/4 Teaspoon Ground Nutmeg or Allspice
1/4 Teaspoon Ground Cloves
1/2 Teaspoon Salt
2 Large Eggs
1 15-ounce Can Pumpkin Puree
1 Teaspoon Vanilla Extract
1 Cup Regular Coconut Milk
1 Unbaked Pie Shell 

Preheat your oven to 425ºF.

Combine the sugars, cinnamon, ginger, nutmeg or allspice, cloves and salt in a small bowl. In a large bowl, beat the eggs. Beat in the sugar mixture, pumpkin, and vanilla until smooth. Fold in the coconut milk.

Pour the filling into the unbaked pie crust and bake for 15 minutes. Reduce the temperature to 350ºF and continue to bake for 50 to 60 minutes, or until a knife inserted comes out clean.  It may be a bit wobbly still, but it will firm-up as it cools.

Allow the pie to cool on a wire rack for 2 hours (Be patient! This is important).  Serve or refrigerate until ready to serve

Pumpkin Flan


I love Flan so when I saw this recipe online I just had to make it. I was glad I had some left over pumpkin puree to make some cookies afterwards! ^_~

If you don't like pumpkin, you can make it without it or add anything else you might like! The only thing I think I did wrong was set the temperature too high in the oven, next time I know to set it lower.

 But besides that this was very yummy and super creamy. The caramel sauce tops it off! 


 Recipe Below!

Enjoy!

 Pumpkin Flan

Ingredients:

1 1/4 cups granulated sugar, divided
1/4 cup water
1 12-ounce can evaporated milk
1 14-ounce can sweetened condensed milk
6 ounces cream cheese, softened
1 cup pumpkin puree
5 eggs
1 tablespoon cornstarch
1/2 teaspoon ground cinnamon
1/4 teaspoon ground cloves
1/4 teaspoon ground ginger
2 teaspoons vanilla extract
Boiling water


Directions:

Preheat oven to 300 degrees F.


For the Caramel:

Combine 1 cup sugar and water in medium, deep, heavy saucepan. Cook over medium heat, stirring constantly, until sugar is dissolved, about 2-3 minutes.  Increase heat to medium-high, and boil, without stirring, until caramel turns a copper brown color, anywhere from about 10-15 minutes.

Using oven mitts, quickly and carefully pour the caramel over bottom and sides of a 10-inch metal pie plate or a flan mold.  That caramel will be screaming hot!


For the custard:

Combine the evaporated milk, sweetened condensed milk, cream cheese, pumpkin puree, 1/4 cup sugar, eggs, cornstarch,  spices and vanilla in a blender. Blend until smooth.

Strain custard mixture through a sieve over the caramel, into the pie plate or mold.  Arrange in a large roasting pan lined with a clean dish towel.


Pour boiling water into the roasting pan until it comes about halfway up the side of your flan vessel.  Bake for 50-60 minutes or until knife inserted near center comes out clean. The center of the flan should still jiggle a little when nudged.  Cool for about 30 minutes.  Chill in the fridge for several hours or overnight.


To unmold, run a sharp knife around the rim of the mold and gently shake to loosen. Invert onto a serving plate.


Pumpkin Bread


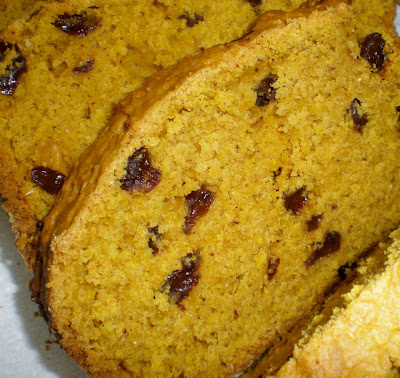
When I think of Autumn I think of the smell of cinnamon and spices. The aroma of this recipe is so heavenly, your house will definitely smell like the holidays!

This pumpkin bread is good to serve with dinner, or for breakfast with any type of spread you would prefer. It's more of a bread texture than a cake, but it taste good none the less!


By adding the raisins in boiling water it plumps them up and makes them soft to the taste. If you don't like raisins you don't have to add them or you can also add cranberry or anything any type of berry, fruit, and or nuts.
Recipe below!
Enjoy!
Pumpkin Bread

makes 2 loaves


½ cup raisins


1 ½ cups all-purpose flour

1 ¼ cups whole wheat flour

½ teaspoon salt

1 teaspoon baking powder

¾ teaspoon baking soda

½ teaspoon ground cinnamon

¼ teaspoon ground nutmeg

1/8 teaspoon ground cloves

1 cup pureed cooked pumpkin (fresh, canned, or frozen)

¾ cup sugar

2 eggs

½ cup vegetable oil


Preheat the oven to 375 F. Plump the raisins by pouring the boiling water over them, letting them rest for about 10 minutes, then draining. Grease and flour two 9-inch loaf pans.

Sift together the all-purpose flour, whole wheat flour, salt, baking powder, baking soda, cinnamon, nutmeg, and cloves. In another bowl combine the raisins, pumpkin, sugar, eggs, and oil and mix well. Stir the dry ingredients into the pumpkin mixture all at once, and mix just until the dry ingredients are blended into the batter.


Transfer the batter into the prepared loaf pans and bake for 50 to 55 minutes. Let the breads cool in the pans for 10 to 15 minutes. Ease them out of the pans and continue cooling on a rack. 

Chewy Chocolate Chip Cookies


I was on a hunt for the best Chewy Chocolate Chip Cookie recipe, and I think I've found one!

I'm not really into baking crispy cookies, unless it ginger snaps, but I've noticed a lot of the chocolate chip cookie recipes I've been baking were coming out a bit crispier then I wanted. I don't know if it was the recipe, cookie sheet or oven, but I was looking for a recipe that made them really soft and chewy. Well I think I've found the best recipe by far! This recipe tells you to add cornstarch, which adds volume and makes the cookies more chewy and soft.

Super yummy recipe! I think I've made this cookie recipe four times now and every time I do there gone super fast!
I got this recipe from Apple A Day blog. Check it out also I will post the recipe below!
Enjoy!

Best-Ever Chewy Chocolate Chip Cookies

Ingredients: 
3/4 c. unsalted butter, softened 
3/4 c. brown sugar 
1/4 c. granulated sugar 
1 egg 
2 tsp. vanilla extract 
2 c. all purpose flour 
2 tsp. cornstarch 
1 tsp. baking soda 
1/2 tsp. salt 
1 c. bittersweet chocolate chips

Directions:
Preheat oven to 350 degrees F.
In the bowl of a stand mixer fitted with a paddle attachment, cream together butter and sugars until fluffy and light in color. Add egg and vanilla and blend in.

Mix in flour, cornstarch, baking soda and salt. Stir in chocolate chunks.

Using a standard-sized cookie scoop or tablespoon, drop dough onto a prepared baking sheet.  Bake for 8-10 minutes, until barely golden brown around the edges.  (The tops will not brown, but do NOT cook longer than ten minutes.)

Let cool, on the sheet, on a wire rack for five minutes.  Remove from baking sheet and let cool completely.  Try not to eat them all.

barely adapted from Anna Olson, Food Network Canada

Homemade Halloween Oreo Cookies


I've been looking at food blogs a lot and came a cross this easy to follow recipe. Made it last night and thought they were really yummy. There such cute cookies specially if you have kids or are going to any Halloween parties. This would be a great recipe for that!
To make them even more prefect for Halloween I divided the cream filling and added green and orange food coloring. You can add any other colors you may like for instances purple or red would be great too. Any thing that screams Halloween! Or you don't even need to add any coloring to the filling. You can leave it just plain white to give it that Oreo effect!
Recipe below!
 
Enjoy!
Homemade Halloween Oreo Cookies
Ingredients:
For the cookies: 
1 1/4 cups all-purpose flour
1/2 cup unsweetened or Dutch process cocoa powder
1 tsp baking soda
1/4 tsp baking powder
1/4 tsp salt
1 to 1 1/2 cups sugar (Use 1 cup for a truer-to-original Oreo wafer or more sugar for a sweeter chocolate cookie) 
10 tbsp (1 stick + 2 tbsp) unsalted butter, at room temperature
1 large egg 

For the cream filling (white): 
4 tbsp (1/2 stick) unsalted butter, at room temperature
1/4 cup vegetable shortening
2 cups confectioners’ sugar, sifted
2 tsp vanilla extract Instructions: 
Preheat the oven to 375˚ F.  Line two baking sheets with silicone baking mats or parchment paper.
In a food processor or the bowl of an electric mixer, combine the flour, cocoa powder, baking soda, baking powder, salt, and sugar.  Mix briefly to combine.  Add the butter to the bowl and pulse or mix briefly to incorporate.  Add in the egg and mix until the dough forms a cohesive mass.
Scoop between 2 tsp to a scant tbsp of batter (depending on how large you want them) onto the baking sheet.  Continue scooping, spacing the dough balls a couple of inches apart.  With moistened fingers, gently press down on the dough balls to flatten slightly.  Bake for 9-11 minutes (closer to 9 minutes for smaller cookies), rotating the pans halfway through baking.  Transfer the baking sheets to a wire rack and let cool completely until the cookies are firm and set.  Be sure the cookies are completely cooled before filling.
To make the filling, combine the butter and shortening in the bowl of an electric mixer.  Beat on medium-high speed until smooth.  Add the confectioners’ sugar to the bowl and mix on low speed just until incorporated, then increase the speed to medium-high and beat until light and fluffy, about 2-3 minutes.  Blend in the vanilla extract.
To assemble the cookies, pair them up by size.  Use a pastry bag fitted with a plain round tip to pipe a swirl of filling onto the flat side of one cookie of each pair.  Sandwich together with the remaining cookie and press down so that the filling reaches the edges. Yield: 20 to 30 sandwich cookies, depending on the size

Source: Retro Desserts by Wayne Bachman

Banana Bread


 What I had for breakfast!
I found this great recipe on Banana Bread online, so I just had to bake it! I got this recipe from Annie Eats Blog. I really love her blog cause she makes such great eats!
It's a pretty easy recipe to follow. You don't need to use a mixer at all, just a whisk or a spatula. It came out super moist and super yummy! The slice bananas on the edges makes the bread look even more delicious! 
Once I took it out the oven and let it sit for a while, I dig right in! I love it when the bread is still warm from the oven. If you bake this, your house will smell like bananas! ^_^
 
 Enjoy!

Banana Bread
Printer-Friendly Version
Ingredients:
1¾ cups all-purpose flour
1 tsp. baking soda
½ tsp. salt
6 large, very ripe bananas (about 2¼ lbs.), peeled
8 tbsp. unsalted butter, melted and cooled slightly
2 large eggs
¾ cup packed light brown sugar
1 tsp. vanilla extract
2 tsp. granulated sugar

Directions:
Preheat the oven to 350˚ F.  Lightly spray a loaf pan (about 9 x 5 inches) with cooking spray.  In a medium bowl, combine the flour, baking soda and salt; whisk together and set aside.

Place 5 bananas in a microwave safe bowl; cover with plastic wrap and make several slits in the wrap to act as steam vents.  Microwave on high until the bananas are soft and have released liquid, about 5 minutes.  Transfer the bananas to a fine mesh strainer set over a medium bowl and let drain, stirring occasionally, about 15 minutes (you should have ½-¾ cup liquid).

Transfer the reserved banana liquid to a medium saucepan over medium-high heat.  Cook until reduced to about ¼ cup, 5-10 minutes.  Remove the pan from the heat.  In a large bowl, combine the bananas and the reduced banana liquid.  Mash with a potato masher or whisk until fairly smooth.  Whisk in the melted butter, eggs, brown sugar and vanilla.  Add the dry ingredients to the bowl with the banana mixture.  Fold together gently, just until all of the dry ingredients are incorporated.  Pour the batter into the prepared pan and smooth with a spatula.

Slice the remaining banana diagonally into ¼-inch thick slices.  Layer the banana slices along both sides of the top of the batter, leaving a couple of inches in the center to allow an even rise.  Sprinkle the sugar evenly over the assembled loaf.

Bake until a toothpick inserted in the center comes out clean, 55-75 minutes.  Transfer to a wire rack and allow to cool at least 15 minutes in the pan before removing.  Continue to cool and serve warm or at room temperature.

Source: Cooks Illustrated & Annies-Eats

Chocolate Overdose Cake


The title is actually the name of this cake. All you chocolate lovers out there has got to make this cake! 

This is a delicious cake to bake for holidays, parties or birthdays . Everyone would love it, chocolate lovers that is! When I ate a slice I thought I died and gone to chocolate heaven!

It has three layers of chocolate goodness.

Frist layer (bottom) starts with a brownie recipe. Second layer (middle) chocolate mousse. Third layer (top) chocolate cake. The finishing topping is chocolate ganache!

That's all I have to say, cause the pictures says it all!


Enjoy!

Chocolate Overdose Cake
Ingredients:
For the brownie base:
1/2 cup plus 2 tbsp. cake flour
1/4 tsp. salt
1/2 tsp. baking powder
3 oz. unsweetened chocolate, chopped fine
6 tbsp. unsalted butter, cut into 6 pieces
1 1/8 cups sugar
2 large eggs
2 tsp. vanilla extract

For the chocolate mousse filling:
6 oz. semi-sweet chocolate, broken into 1/2-oz. pieces
1 7/8 cups heavy cream
1 tbsp. sugar

For the chocolate cake:
2 oz. unsweetened chocolate, coarsely chopped
1/8 cup Dutch-processed cocoa
1/4 cup hot water
7/8 cup sugar, divided
7/8 cups unbleached all-purpose flour
3/4 tsp. baking soda
1/2 tsp. salt
1/2 cup buttermilk
1 tsp. vanilla extract
2 large eggs
1 large egg yolk
6 tbsp. unsalted butter, soft

For the ganache:
1 1/2 cups heavy cream
2 tbsp. unsalted butter
18 oz. semisweet chocolate, broken into 1/2-oz. pieces

Directions:

To make the brownie base, line the bottom of a 9-inch springform pan with a round of parchment paper and spray the sides with nonstick cooking spray.  Center a rack in the oven and preheat to 325 degrees F.  In a medium bowl, combine the cake flour, salt and baking powder.  Stir with a fork to mix.  Melt the chocolate and butter in a large heatproof bowl set over a saucepan of almost-simmering water, stirring occasionally, until smooth.

When the chocolate mixture is completely smooth, remove the bowl from the saucepan and gradually whisk in the sugar.  Add the eggs one at a time, whisking after each addition until thoroughly combined.  Whisk in vanilla.  Add in the flour mixture in two additions, folding with a rubber spatula until completely homogenous.

Transfer the batter to the prepared pan and smooth with a spatula.  Set aside, prepare the cake batter, and bake the two layers at the same time.

To make the cake, line the bottom of a 9-inch round cake pan with a round of parchment paper.  Grease and flour the sides of the pan.  Combine the chocolate, cocoa and hot water in a medium heatproof bowl; set the bowl over a saucepan containing 1-inch of simmering water and stir with a rubber spatula until chocolate is melted, about 2 minutes.  (Note: at this point, my mixture was pretty thick and I thought I had ruined it, but mixing in the sugar was like magic and it made it smooth and liquidy again.)  Add 1/4 cup of sugar to the chocolate mixture and stir until thick and glossy, 1 to 2 minutes.  Remove bowl from heat and set aside to cool.

Whisk flour, baking soda and salt in a medium bowl; set aside.  Combine buttermilk and vanilla in a small bowl.

In the bowl of a stand mixer fitted with the whisk attachment, whisk the eggs and yolks on medium-low speed until combined, about 10 seconds.  Add remaining sugar, increase speed to high, and whisk until fluffy and lightened in color, 2 to 3 minutes.  Replace whisk with paddle attachment.

Add the cooled chocolate mixture to the egg/sugar mixture and mix on medium speed until thoroughly incorporated, 30-45 seconds, pausing to scrape down sides of bowl with rubber spatula as needed.  Add softened butter one tablespoon at a time, mixing about 10 seconds after each addition.  Add about one third of the flour mixture followed by half of the buttermilk mixture, mixing until incorporated after each addition (about 15 seconds).  Repeat using half of remaining flour mixture and all of remaining buttermilk mixture (batter may appear separated).  Scrape down the sides of the bowl and add remaining flour mixture; mix at medium-low speed until batter is thoroughly combined, about 15 seconds.  Remove bowl from mixer and fold batter once or twice with rubber spatula to incorporate any remaining flour.  Pour into prepared pan; smooth batter to edges of pan with an offset spatula.

Bake the brownie and cake layers at the same time: the brownie for 25-30 minutes and the cake for 30 minutes, or until a toothpick inserted in the center of each comes out clean.  Transfer the pans to a wire cooling rack.  Allow the brownie to cool completely in the pan.  Allow the cake to cool in the pan for 15 minutes, then invert onto the wire rack and allow to cool completely.

Once the brownie layer has cooled, run a knife around the edges to separate it from the pan.  Remove the sides of the springform but leave the brownie layer on the springform base.  Form a ring of parchment paper around the brownie layer and extending up the sides of the springform pan – reclose the springform so that the parchment is fitted tightly to the sides.

To make the chocolate mousse filling, place a stand mixer bowl and whisk attachment in the freezer or fridge.  Heat 1-inch of water in the bottom half of a double boiler over medium heat.  Place the semisweet chocolate in the top half of the double boiler.  Tightly cover the top with plastic wrap and allow to heat for 8-10 minutes.  Remove from the heat and stir until smooth.  Transfer the melted chocolate to a stainless steel bowl and set aside until needed.

Place heavy cream and sugar in the well-chilled bowl of an electric mixer fitted with the chilled whisk attachment.  Whisk on high speed until stiff peaks form, about 1 1/2 minutes.  Remove the bowl from the mixer.  By hand, whisk to combine 1/4 of the whipped cream into the melted chocolate until smooth and completely incorporated.  Add the combined whipped cream and chocolate to the remaining whipped cream and use a rubber spatula to fold together.

Spread the mousse over the top of the brownie base evenly.  Use an offset spatula to smooth the top.  Place the cooled cake round over the mousse, pressing down lightly.  Chill for at least 1 hour.

To make the ganache, heat the heavy cream and the butter in a saucepan over medium high heat.  Bring to a boil.  Place the semisweet chocolate in a 3-quart stainless steel bowl.  Pour the boiling cream over the chocolate and allow to stand for 5 minutes.  Stir until smooth.  Chill 1 cup of ganache for 1 hour.  Allow the remaining ganache to come to room temperature (about 40 minutes).

Remove the springform ring and parchment collar from the assembled cake.  Carefully transfer the cake to a serving platter, removing the springform base and parchment round.  Use a spatula to smooth the room temperature ganache over the cake top and sides, covering evenly.

Place the chilled ganache in a pastry bag fitted with a shell tip and pipe a shell border around the base of the cake.  Pipe 12-16 rosettes around the top of the cake to indicate servings.  Serve chilled and store leftovers in the fridge.  Cut the cake with a hot, dry knife.

Source: annies-eats & Confections of a Foodies Bride

Iced Pumpkin Cookies


 I'm a big fan of allrecipes.com so I like to go to that site for just about anything. I saw this recipe for Iced Pumpkin Cookies and the reviews were great so I had to try them out!

If you love pumpkin than you'll love these, there super yummy and so soft. The icing on top makes the cookies even better! The recipe is real easy to follow. If your not a pumpkin fan then that's okay there's lots of other cookies recipes on this site so check them out!


Enjoy!


Iced Pumpkin Cookies

Ingredients:
2 1/2 cups all-purpose flour
1 teaspoon baking powder
1 teaspoon baking soda
2 teaspoons ground cinnamon
1/2 teaspoon ground nutmeg
1/2 teaspoon ground cloves
1/2 teaspoon salt
1/2 cup butter, softened
1 1/2 cups white sugar
1 cup canned pumpkin puree
1 egg
1 teaspoon vanilla extract  
Icing Glaze
2 cups confectioner's sugar
3 tablespoons milk
1 tablespoon melted butter
1 teaspoon vanilla extract
  
Directions:  
Preheat oven to 350 degrees F (175 degrees C). Combine flour, baking powder, baking soda, cinnamon, nutmeg, ground cloves, and salt; set aside. 
In a medium bowl, cream together the 1/2 cup of butter and white sugar. Add pumpkin, egg, and 1 teaspoon vanilla to butter mixture, and beat until creamy. Mix in dry ingredients. Drop on cookie sheet by tablespoonfuls; flatten slightly. 
Bake for 15 to 20 minutes in the preheated oven. Cool cookies, then drizzle glaze with fork. 
To Make Glaze: Combine confectioners' sugar, milk, 1 tablespoon melted butter, and 1 teaspoon vanilla. Add milk as needed, to achieve drizzling consistency. 
Source: allrecipes.com
Related Posts Plugin for WordPress, Blogger...