Showing posts with label Chocolate. Show all posts

Thursday, November 15, 2012

Chocolate Birthday Cake with Whipped Vanilla Frosting


How could I totally forget to write a blog post about this delicious Chocolate Birthday Cake! Well let me get started then!

It was my best friends birthday about a month ago and I asked her what kind of cake she wanted? She said she didn't want a cake. I was like "What?". Everybody deserves a cake for there birthday, right? Plus birthdays give me a great excuse to bake a new cake recipe! So I tried again, and asked her what she wanted instead. Her answer...Banana Bread. I told her no problem, so I made one plus a cake. I very pink cake if I might add. A very pink cake with Whipped Vanilla Frosting (that taste like ice cream!)


 The cake it self is very moist chocolate cake. It's super delicious, together with the frosting makes an awesome combination. I got this cake recipe from Sweetapolita. I used her Chocolate Birthday Cupcakes recipe 3-times the batch. Each batch makes 1 (8-inch round layer).


For the Whipped Vanilla Frosting I used her frosting recipe from her Vanilla Birthday Cake. The frosting is super creamy. Almost taste like ice cream! I'm all for frosting that taste like ice cream! This frosting also pipes really nice. I used Ateco #849 for the top border and Wilton #2D for the bottom border. At the time I didn't have a cake spatula, so I had no choice but to use a butter knife. It would have came out a lot cleaner with an angled spatula. To ahieve pink frosting I used a few drop of AmeriColor Gel Paste in Electric Pink. Don't forget every pink cake needs to be dressed up in sprinkles! Go on, don't be shy...pile tons of it on!


Over all this cake turned out great. It was a huge hit on her birthday. She end up loving it and the Banana Bread!

Enjoy!

Chocolate Cake
(make 3-times this recipe for 3, 8-inch round pan)

Ingredients:
For Cake Layer
3/4 cup (95 g) all-purpose flour
3/4 cup (150 g) white sugar
1/4 cup (30 g) dark cocoa powder
3/4 teaspoon (3.5 g) baking soda
3/4 teaspoon (3.5 g) baking powder
3/4 teaspoon (3.5 g) cornstarch
1/2 teaspoon (4 g) salt
1/3 cup (80 mL) buttermilk
1/4 cup (60 mL) brewed coffee or espresso, hot
3 tablespoons (45 ml) vegetable oil
1 egg, room temperature, lightly beaten
1-1/2 teaspoons (7.5 mL) pure vanilla extract 

Directions:

Preheat oven to 350° F and line a muffin/cupcake pan with your favourite cupcake liners.

In the bowl of electric mixer fitted with the paddle attachment, sift flour, sugar, cocoa powder, baking soda, baking powder, cornstarch and salt.

In a medium bowl or measuring cup, combine the buttermilk, coffee, oil, egg and vanilla.

Add liquid mixture to dry ingredients and mix for 2 minutes on medium speed (you may need the plastic splashguard that comes with mixer), Divide batter among (2/3 full or just less) liners. Batter will be liquidy, and cupcakes will rise.

Bake for 15-17 minutes, or until toothpick or skewer comes out with a few crumbs. Try not to over-bake. Carefully remove cupcakes from the pan immediately (it's hot!), and place them on a wire rack until completely cool. 

Source: Sweetapolita

For the Whipped Vanilla Frosting 

2-1/2 cups (5 sticks)(575 grams) unsalted butter, softened and cut into cubes
5-1/4 cups (600 grams) confectioners’ sugar, sifted 
4-1/2 tablespoons (70 mL) milk
1-1/2 tablespoons (23 mL) pure vanilla extract
pinch or two of salt
few drops pink gel colour
pastel sugar pearls, or any other sprinkles for decorating

Directions:

In the bowl of an electric mixer fitted with the paddle attachment, whip butter for 8 minutes on medium speed (I use “4″ on my KitchenAid). Butter will become very pale & creamy.

Add remaining ingredients and mix on low-speed for 1 minute, then on medium speed for 6 minutes. Frosting will be very light, creamy, and fluffy. If you want all of your frosting (for filling and frosting cake) pink, then add a drop of pink gel colour and mix again, adding one drop at a time until desired pink shade is achieved (see notes). If you want just the outside of the cake pink, you will fill the cake layers first, and then colour the remaining frosting pink.

Best used right away (for ideal spreading consistency), but keeps well once frosted. 

Source: Sweetapolita


Tuesday, October 30, 2012

Chocolate Pumpkin Cupcakes with Cinnamon Buttercream Frosting


Happy Halloween!

How's everyone doing on the east coast? This hurricane sandy was just crazy! But I just didn't want to let this hurricane keep me away from my baking. While I still have power, I wanted to bake up some very yummy Chocolate Pumpkin Cupcakes. Just in time for Halloween too! I wanted to incorporate some pumpkin into my chocolate cupcakes, so I found this wonderful recipe on I am Baker. This is the most moist cupcakes I've ever tasted!


For the Cinnamon Buttercream, I found this recipe on My Kitchen Addiction. I minus the brown sugar in this recipe because I didn't want it overly too sweet. This frosting is so darn good! I love the added cinnamon in this frosting, gives it a kick. Combine together makes the most delicious cupcakes, I've tried!

I also love these cute Halloween baking cups I bought from Tops. I think I'm going to go back and get some more for next year! ^_~


 For the finishing touch I drizzle some Vanilla Bean Caramel Sauce on these babies! This caramel sauce is so so good! I drizzle this sauce on everything, and I mean EVERYTHING! I love drizzling this on top of ice cream. Oh man...I think I'll have some when I'm done with this blog post...lol I will post this recipe soon!

This is a wonderful treat for Halloween. If your going to have a party, make them. If you have kids, make them, and if you don't and it's just you...make them!

Enjoy!

Chocolate Pumpkin Cupcakes
Makes 24 cupcakes

Ingredients:

1 cup brown sugar
1 cup white sugar
1/2 cup buttermilk
1 cup canned pumpkin
1 tablespoon vanilla
3/4 cups softened butter
4 Eggs
1 1/2 cups flour
2/3 cups cocoa
2 teaspoons baking powder
1 teaspoons baking soda
1/2 teaspoons salt

Instructions:

Heat oven to 350

In a small bowl combine buttermilk and pumpkin. Just mix together until incorporated.

In a medium bowl, sift together flour, cocoa, baking powder, baking soda, and salt.

In a mixer, beat the butter, sugars, and vanilla together until light and fluffy. Add in eggs, one at a time, until fully incorporated.

Alternating, add the flour mixture and buttermilk mixture to the sugar mixture. Beginning and ending with the flour mixture.

Mix for 1 minute on low until fully combined. Using an ice cream scoop or 1/4 cup measuring cup, place batter in prepared cupcake pan.

Bake for 16-20 minutes. Cupcakes are done when an inserted toothpick comes out clean.

Source: I am Baker

Cinnamon Brown Sugar Buttercream

1 stick unsalted butter, softened
1/4 cup shortening
1/3 cup dark brown sugar, packed (I excluded this ingredient)
1/2 teaspoon cinnamon
3 cups powdered sugar (varies based on temperature/humidity)
3 tablespoons half and half (varies based on temperature/humidity)

In a large mixer bowl, combine the butter and shortening. Whip together with the whisk attachment until light and fluffy. 

Add the brown sugar and cinnamon and whisk until well combined.

Gradually add the powdered sugar, 1/2 cup at a time. Alternately add the half and half, whipping the icing on medium-high speed after each addition, until the desired consistency is reached.

Fill a pastry bag with the icing and pipe the icing onto the cupcakes. Top the cupcakes with Halloween candy and a sprinkle of cinnamon, if desired.

Source: My Kitchen Addiction


Thursday, October 25, 2012

Chocolate Peanut Butter Layer Cake


I've always loved to bake birthday cakes for my family and friends. One of my dearest friend's birthday was coming up and I was having a bit of trouble deciding on what type of cake to bake for her. But as I thought I remembered her loving peanut butter. Peanut butter goes great with chocolate so I googled for a chocolate peanut butter cake recipe and came across this one from Annie's Eats Blog. I've made lots of recipes from her blog so I was super excited to give this cake a try!


The cake it self is delicious and very moist, so be careful when trying to assemble the cake layers. One of my layers broke in half, but it was okay cause once the cake layers come together, you wont noticed it. ~_^


This cake is absolutely delicious! The frosting is super yummy. It taste like peanut butter whipped cream! If you love peanut butter, you'll love this cake. This cake would be great for Halloween! Make it! You wont regret it!

Enjoy!

Chocolate Peanut Butter Layer Cake

Friday, August 17, 2012

Savory Sweet Life's "The Best Chocolate Chip Cookie Recipe EVER!


My mood this week has been a bit down. I've tried cheering myself up by doing the things I love, but nothing was really working right. I'm guessing the cause is from the summer heat, which is keeping me away from the kitchen. It kept me out the kitchen from doing the two things I love, cooking and baking. But a girl has to eat! So I thought what better way to brighten up my melancholy mood than to crank up the oven and bake Savory Sweet Life's "The Best Chocolate Chip Cookie Recipe EVER"!

I found this recipe off of a blog called, My baking Addiction. So I followed the link and headed over to Savory Sweet Life's blog. This chocolate chip cookie recipe is from a cook book called, Savory Sweet Life's: 100 Simply Delicious Recipes for Every Family Occasion.
 The author of book is Alice Currah and her blog, Savory Sweet Life. I'm so adding this book to my Amazon wishlist!


I must say these cookies are so deliciously chewy and soft. The dark brown sugar adds a deeper rich flavor, unlike light brown sugar. Though I'm not saying you don't get great cookies with light brown sugar, it's just you can taste a differences. I divided up both semi-sweet and bitter-sweet chocolate chips for this recipe. I didn't have enough semi-sweet chocolate, plus I like the combination of both chocolates. Definitely one of the best chocolate chip cookies I've made by far!

These cookies sure did brighten up my mood, I'm sure yours will too!

Enjoy!

Savory Sweet Life's "The Best Chocolate Chip Cookie Recipe EVER"
Yield: 4 dozen cookies Prep time: 10 minutes Cook time: 12 minutes


Ingredients:

1 cup (2 sticks) salted butter, softened
1/2 cup sugar
1 1/2 cup packed brown sugar
2 eggs
2 tsp. vanilla extract
2 3/4 cups (12 oz) all-purpose flour *If at all possible, please weigh the flour
3/4 tsp. smallish-medium coarse sea salt
1 tsp. baking soda
1 1/2 tsp. baking powder
2 1/4 cups semi-sweet chocolate chips

Directions: 
Preheat oven to 360 degrees. 
Cream butter, sugar, and brown sugar until it is nice and fluffy (approx. 3 minutes on medium-high speed on a K-5). Add both eggs and vanilla and beat for an additional 2 minutes. Add baking soda, baking powder, salt, and flour until cookie batter is fully incorporated. Finally add chocolate chips until well distributed. The cookie batter should be somewhat thick. 
Drop about 2 tablespoons of dough or use a medium cookie scoop and plop the batter onto a baking sheet lined with parchment paper. 
Bake for 12-14 minutes until the edges are nice and golden brown. Remove from heat and allow the cookies to stay on the cookie sheet for an additional 2 minutes. Pick up the parchment paper with the cookies still on top and transfer to a cool non-porous surface. Allow the cookies to cool on the paper for at least 3 minutes before serving. Enjoy!
Savory Sweet Life's Notes

*please do not use table salt, the sea salt gives the cookies a nice flavor and hints of texture. If you only have table salt, use 1/2 tsp.

 *When using sea salt, you will get small crunchy flecks of salt when you bite into the cookie. If you do not like this taste, go with 1/2 teaspoon of table salt.

*I realized grocery stores sell bags of chocolate chips in 12 oz bags but this recipe really needs every last chip. Otherwise you’ll get cookies with only a few chips in each one and this recipe requires lots of chocolate to bulk the cookie up. You’ll need about 1 1/2 bags.

Source: Savory Sweet Life

Tuesday, July 24, 2012

Mini Chocolate Chip Cookies


I was craving for some chocolate chip cookies, but I didn't want to make a big batch of cookies like I usually do. So I got my Kindle, and scrolled down to my Baking Recipe Books. I decided on baking a cookie recipe from Cookie Cravings: 30 All-Time Favorite Recipes. I got the Kindle edition when it was only a dollar. It's great book with tons of great cookie recipes! The author of this book which is Maria Lichty, is from Two Peas and Their Pods. Tons of great recipes on that site!


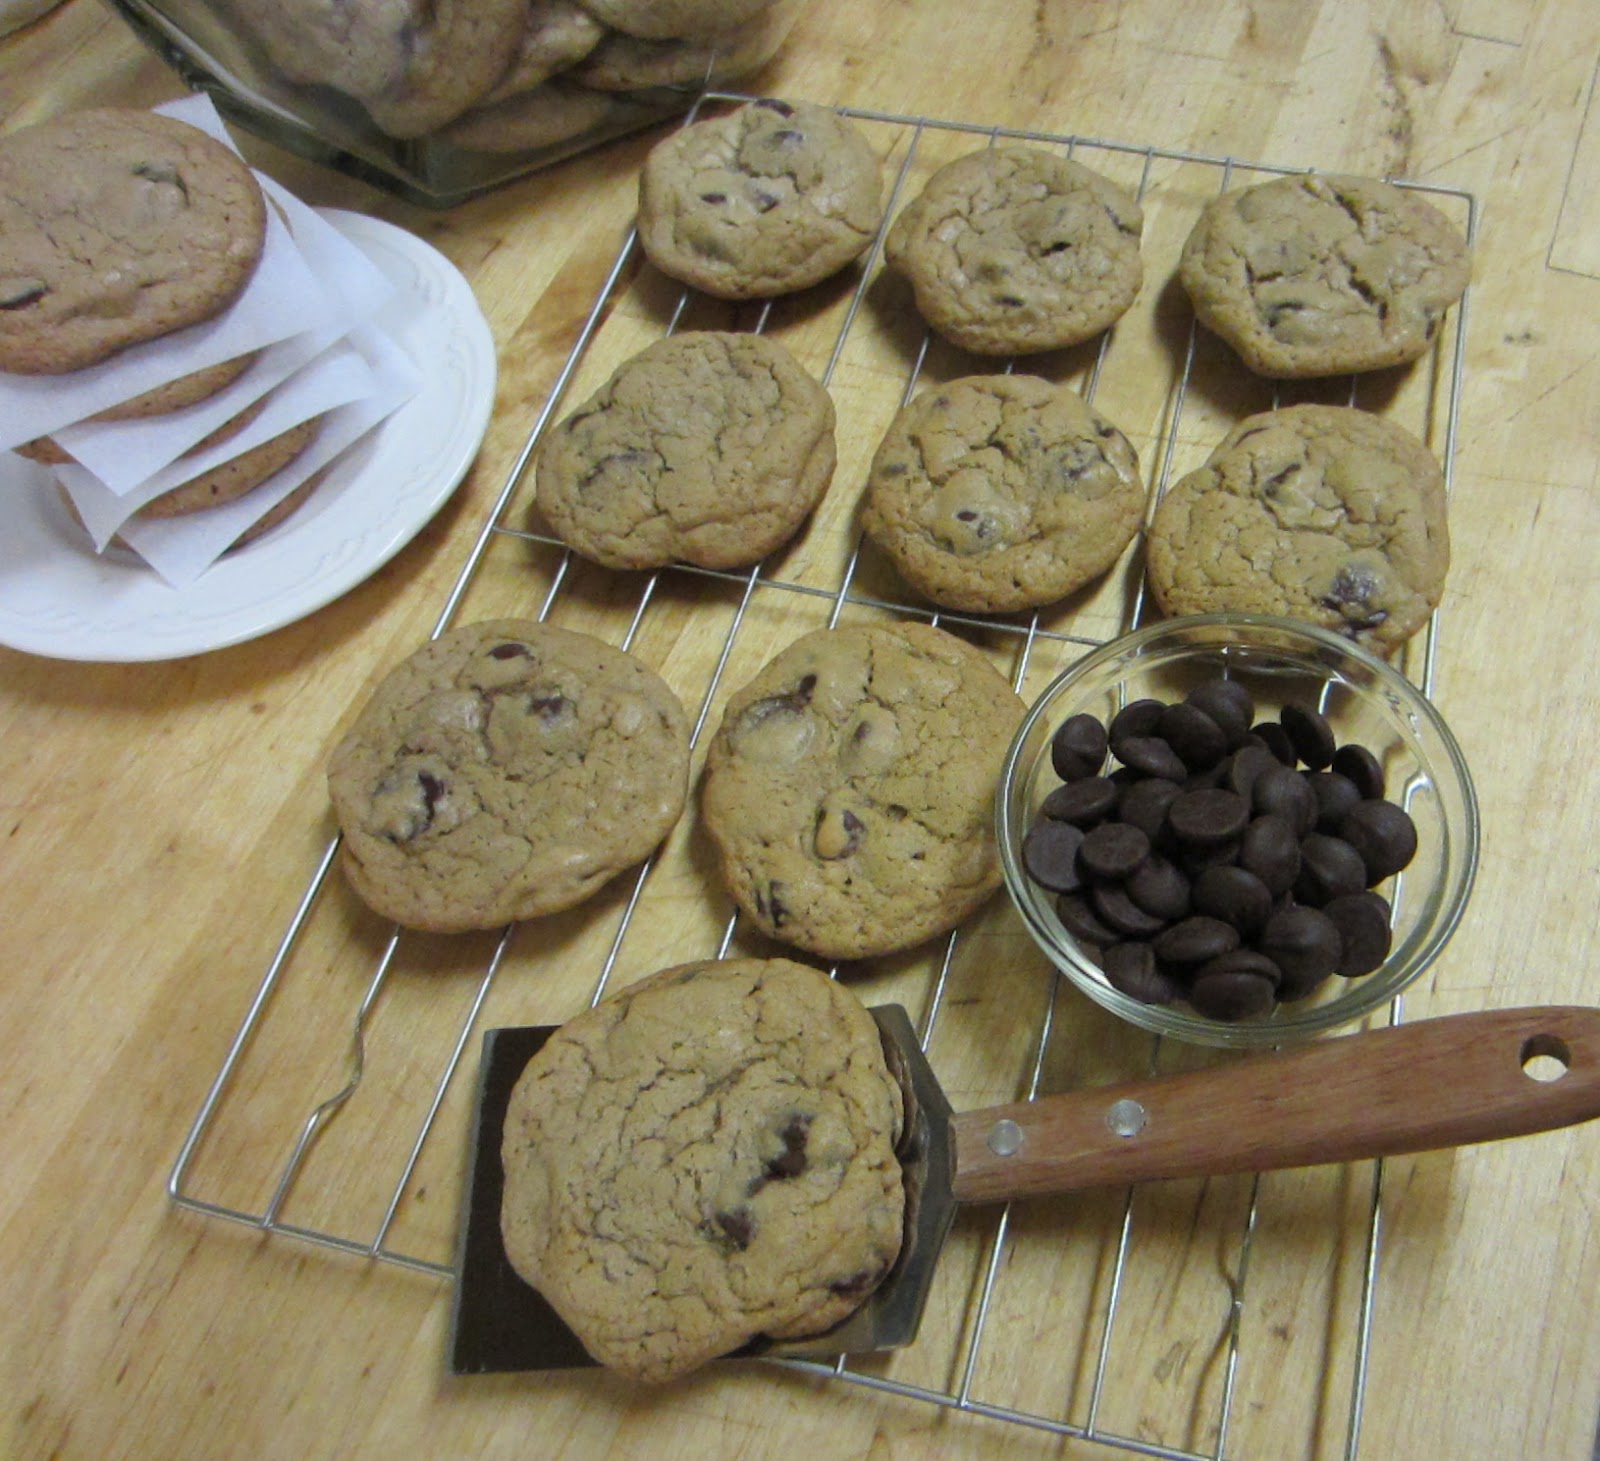
These cookies are mini and so cute, that I almost didn't want to eat them...almost! But I did and boy there really good! The mini chocolate chips come in handle when baking up a small batches of cookies like these. They almost look like store bought cookies. These cookies are great for any occasion. Be prepared cause they will go quick! I have many cookie monsters at home, I don't mean kids! haha


I'm loving this cookie spatula that I got for a dollar at Rite Aid! I can transfer two mini cookies on it or one big cookie, one at a time. I love getting things for a dollar! ^_^

You can also find this recipe on her site (link here!)

What are your favorite cookies?

Enjoy!


Mini Chocolate Chip Cookies
Yield: Makes about 3 dozen mini cookies / Bake Time: 8 minutes

Ingredients:


1 3/4 cups all-purpose flour
1/2 teaspoon salt
1 teaspoon baking soda
1/2 cup unsalted butter, at room temperature
1/2 cup packed brown sugar
1/3 cup granulated sugar
1 large egg
1 teaspoon vanilla extract
3/4 cup mini chocolate chips

Directions:

1. Preheat the oven to 350 degrees F. Line a baking sheet with parchment paper or a silicone mat and set aside.

2. In medium bowl, whisk the flour, salt, and baking soda together. Set aside.

3. In the bowl of a stand mixer, cream the butter and sugars together until creamy and smooth. Add in the egg and vanilla extract.

4. Slowly mix in the flour, until combined. Stir in mini chocolate chips.

5. Roll dough into tiny balls, about 2 teaspoons of dough. Place on baking sheet and slightly flatten with the palm of your hand. Bake for 8 minutes or until cookies are golden brown and set. Remove from the oven and let cool on baking sheet for 2 minutes. Transfer to a wire rack to cool.

Monday, June 4, 2012

Chocolate Chip Cookies


So I'm always on the hunt for some more delicious Chocolate Chip Cookies and I found another great recipe!

I was on Amazon a few days ago looking for some delicious baking books. I found this one book called Cookie Cravings: 30 All-Time Favorite Recipes. This is the Kindle Edition for $0.99! Only under a dollar, I had to order it, so I did! This book is by Maria Lichty. She has a blog called Two Peas and Their Pod.  There's a bunch of great recipe on there so check out her site!

So as I was saying I was looking for another great Chocolate Chip Cookie recipe and decided to make this one! She calls it "Our Favorite Chocolate Chip Cookies". I can now understand why this recipe is her favorite! It's super chewy and soft! I'm glad I didn't bake all the dough cause I would love to see how these cookies taste after 72 hours.

Once I made the recipe I refrigerated the dough for 24 hours! The dough can be chilled for 72 hours.

This is the cookie dough after being refrigerated for 24 hours. I didn't have a bigger cookie scoop then the 1 1/2 in. as you see in the above picture. So I just scooped some cookie dough out and added two scoops together, then rolled them into a ball. I did that so I could achieve a big cookie.

Here are the cookies after being removed from the oven. I left them on the pan for about 3 minutes and then transfer them to a cooling rack.

Here they are cooling. Don't they look so good? Don't be tempted to try one just yet, there hot! Wait until the cookies are completely cool. Once there cool try a piece, then maybe another! ^_~


Mmmm...look at that delicious cookie! Well I'm about to head to the kitchen and bake up some more! I also have another cookie recipe called New York Times Chocolate Chip Cookies, which are awesome! {recipe here!} Like always the recipe for these "Our Favorite Chocolate Chip Cookies" will be down below!

After 72 hours from being chilled in the refrigerator, these cookies came out some much better! It's more crispy around the edges and chewy in the center!

Let me know what's your favorite cookie recipe, so I can try them out!

Enjoy!


Our Favorite Chocolate Chip Cookies
Makes 20 large (4-inch) cookies // Bake Time: 12-14 minutes

2 1/2 cup all-purpose flour
2 cups cake flour
1 1/2 teaspoons baking powder
1 1/2 teaspoons baking soda
1 teaspoons sea salt
1 1/2 cups (3 sticks) unsalted butter, at room temperature
1 1/4 cups light brown sugar
1 cup granulated sugar
2 large eggs
3 teaspoons vanilla extract
2 cups semi-sweet chocolate chips
Sea salt, for sprinkling

1. In a large bowl, whisk together the all-purpose flour, cake flour, baking powder, baking soda, and sea salt. Set aside.

2. In the bowl of a stand mixer, beat the butter, brown sugar, and granulated sugar together until smooth and creamy, about 5 minutes. Add in the eggs, one at a time. Add in the vanilla extract and mix until combined.

3. With the mixer on low, slowly add the dry ingredients to the wet ingredients, about 1/2 cup flour mixture at a time. Mix until just combined. Stir in the chocolate chips.

4. Wrap the cookie dough in plastic wrap and chill for at least 24 hours. The dough can be chilled for 72 hours.

5. When ready to bake, preheat the oven to 350 degrees F. Line a large baking sheet with a Silpat baking mat or parchment paper. Take about 1/4 cup of cookie dough and roll into a large ball. Place cookie dough balls on the prepared baking sheet, about 3 inches apart. Sprinkle with sea salt. Bake cookies for 12-14 minutes, or until the cookies are slightly golden brown around the edges. Remove from the oven and let cookies cool on the baking sheet for 3 minutes. Transfer to a wire cooling rack and cool completely.

Friday, May 25, 2012

Cosmic Brownies


Have you guys ever had Little Debbie's Cosmic Brownies before? Well apparently this recipe's meant to taste like Little Debbie's. I've had a Cosmic Brownie by Little Debbie and I must say this does not taste exactly like them but not far from them! 

This Brownie recipe is very rich, almost too rich for me. But none the less It's really good! Just make sure to cut a small slice and pour your self a glass of milk with these babies. I don't know about you but I love my brownies chilled in the fridge. I'm not into a warm brownies!


I thought this recipe was fun and easy to follow. Give it a try if you like rich chocolate, ganache and sprinkles! 


Cosmic Brownies 
Source: adapted from Elle's New England Kitchen, une Gaminedans la Cuisine

Brownies
1 cup granulated sugar
2/3 cup brown sugar
3/4 cup (that's 1 1/2 sticks) unsalted butter, melted and slightly cooled
2 tablespoons milk (or cream) (used coconut milk)
2 large room temperature eggs
2 teaspoons vanilla extract
1 1/2 tsp espresso powder (didn't use)
1 1/3 cups all-purpose flour
3/4 cup unsweetened cocoa
1/2 teaspoon baking Powder
1/4 teaspoon salt

Ganache
1/2 cup heavy cream (coconut milk)
7 oz bittersweet chocolate, chopped (used semi-sweet & dark chocolate)
pinch of salt

Topping
mini stars (or anything tiny and edible that you have on hand)

Method
Preheat the oven to 350 F. Lightly spray or grease a foil-lined 9x13-inch baking pan; Set aside.

In a large mixing bowl, whisk together the sugars, melted butter, cream, eggs, vanilla, and espresso powder; Set aside.
In a separate bowl, combine the flour, cocoa, baking powder, and salt.
Using a large rubber spatula, or a wooden spoon, fold the dry ingredients into the wet until just combined.
Spread the batter into prepared pan.
Bake for 18-20 minutes, or until a thin knife inserted into the center comes out with only a few moist crumbs. (Try not to over-bake.)
Remove the brownies from the oven place the pan onto a cooling rack.

While the brownies are cooling, prepare the ganache.

For the ganache: Place the chopped chocolate into a large, heatproof bowl.
In a small saucepan, bring the cream to just a simmer. Pour the hot cream over the chocolate and sprinkle with salt. Allow the chocolate to sit in the hot cream for about 3-5 minutes. Use a small whisk or spatula to stir the chocolate into the cream until the mixture is smooth and the chocolate has melted.

Pour the ganache over the semi-cool brownies. Use a small knife or an off-set spatula to spread the ganache over the entire pan of brownies.
Immediately sprinkle the ganache with your decoration of choice.
Refrigerate the brownies until they are completely cool, and the ganache has set.

Use a hot knife to slice the brownies into squares. 

Sunday, March 18, 2012

New York Times Chocolate Chip Cookies


Is your mouth watering? If not then what's wrong with you? lol You should be begging me for a cookie! But don't you worry, they'll be no begging cause like always the recipe will be below!

I though my Chewy Chocolate Chip Cookies Recipe were good but I found an even better chocolate chip cookie recipe! If your thinking of making this New York Times Chocolate Chip Cookies recipe than you better have the patience. For this recipe you have to wait 24 hours and up to 72 hours.


I love these cookies cause they are crispy around the edges and soft, chewy and buttery in the middle. I used a big ice cream scoop to make big cookies. One cookie was a enough to satisfy me. I used 60% cocoa and semi-sweet chocolate chip.


Just look at all that goodness! These cookies are so good that I'm planning on making them again.

Follow the instructions of this recipe and your cookies will come out delicious!


New York Times Chocolate Chip Cookies
Yield: 1 1/2 dozen 5-inch cookies.

Ingredients: 

2 cups minus 2 tbsp (8 1/2oz.) cake flour
1⅔ (8 1/2oz.) bread flour
1¼ tsp baking soda
1½ tsp baking powder
1½ tsp coarse salt
2½ (1 1/4cups) unsalted butter
1¼ cups (10oz.) light brown sugar
1 cup plus 2 tbsp (8oz.) granulated sugar
2 large eggs
2 tsp natural vanilla extract
1¼ pounds bittersweet chocolate discs or fèves, at least 60 percent cacao content (see note)
sea salt

Instructions:

Sift flours, baking soda, baking powder and salt into a bowl. Set aside.


Using a mixer fitted with paddle attachment, cream butter and sugars together until very light, about 5 minutes.


Add eggs, one at a time, mixing well after each addition. Stir in the vanilla.

Reduce speed to low, add dry ingredients and mix until just combined, 5 to 10 seconds.

Drop chocolate pieces in and incorporate them without breaking them.

Press plastic wrap against dough and refrigerate for 24 to 36 hours. Dough may be used in batches, and can be refrigerated for up to 72 hours.

When ready to bake, preheat oven to 350 degrees. Line a baking sheet with parchment paper or a nonstick baking mat. Set aside.

Scoop 6 3 1/2-ounce mounds of dough (the size of generous golf balls) onto baking sheet, making sure to turn horizontally any chocolate pieces that are poking up; it will make for a more attractive cookie.

Sprinkle lightly with sea salt and bake until golden brown but still soft, 18 to 20 minutes.
Transfer sheet to a wire rack for 10 minutes, then slip cookies onto another rack to cool a bit more.
Repeat with remaining dough, or reserve dough, refrigerated, for baking remaining batches the next day.

Eat warm, with a big napkin.

Notes: 

Make sure you bake these on the center rack of your oven.

Disks are sold at Jacques Torres Chocolate; Valrhona fèves, oval-shaped chocolate pieces, are at Whole Foods.

Tuesday, December 20, 2011

Chocolate Crackles


One of many favorite!

This chocolate cookie recipe is one of my faves and many others have said it was there's. Chocolate Crackles are really festive for the holiday season. You can even gift wrap them and give them out as Christmas treats.

My friends & family comment saying they taste like mini brownies, and they do. Great with a tall glass of milk.

Recipe Below!

Enjoy!

Chocolate Crackles
Ingredients:

8 oz bittersweet chocolate, finely chopped
1 1/4 cups all-purpose flour (2 1/2 cups @8500 ft.)
1/2 cup unsweetened Dutch-process cocoa powder
2 tsps baking powder (1 1/2 tsps @8500 ft.)
1/4 tsp coarse salt (1/2 tsp @8500 ft.)
1/2 cup (4 oz.) unsalted butter, room temperature
1 1/2 cups light brown sugar, packed (1 1/4 cups @8500 ft.)
2 large eggs
1 tsp vanilla extract (2 tsps @8500 ft.)
1/3 cup whole milk
1 cup granulated sugar
1 cup powdered sugar

Directions:  

Melt the chocolate in a heatproof bowl over a hot water bath or on medium-low power in a microwave, stirring occasionally. Set aside to let cool. 

Sift (or whisk) the flour, cocoa, baking powder, and salt together in a bowl. 

Beat the butter and light brown sugar together for a couple of minutes until fluffy. Beat in the eggs and vanilla, then beat in the melted chocolate. Slowly mix half of the flour into the butter mixture. Mix in half of the milk until incorporated. Mix the remaining flour and then the milk until combined. 

Place the dough in the refrigerator for a minimum of 2 hours or until the dough is firm. 

Preheat the oven to 350°F. 

Pinch off pieces from the dough and roll into 1-inch balls. Coat each dough ball in granulated sugar then in powdered sugar and place 2 inches apart on a parchment-lined baking sheet. Bake until the surfaces crack – about 14 minutes (10 minutes @8500 ft.). You can rotate the baking sheets halfway through the baking time, but I didn’t need to.

Remove from baking sheets to cooling racks until completely cooled. Store cookies between layers of parchment or wax paper in airtight containers at room temperature. Good for up to 3 days. Makes 60 cookies.

Source: from Martha Stewart’s Cookies & Use Real Butter

Chewy Chocolate Chip Cookies


I was on a hunt for the best Chewy Chocolate Chip Cookie recipe, and I think I've found one!

I'm not really into baking crispy cookies, unless it ginger snaps, but I've noticed a lot of the chocolate chip cookie recipes I've been baking were coming out a bit crispier then I wanted. I don't know if it was the recipe, cookie sheet or oven, but I was looking for a recipe that made them really soft and chewy. Well I think I've found the best recipe by far! This recipe tells you to add cornstarch, which adds volume and makes the cookies more chewy and soft.

Super yummy recipe! I think I've made this cookie recipe four times now and every time I do there gone super fast!
I got this recipe from Apple A Day blog. Check it out also I will post the recipe below!
Enjoy!

Best-Ever Chewy Chocolate Chip Cookies

Ingredients: 
3/4 c. unsalted butter, softened 
3/4 c. brown sugar 
1/4 c. granulated sugar 
1 egg 
2 tsp. vanilla extract 
2 c. all purpose flour 
2 tsp. cornstarch 
1 tsp. baking soda 
1/2 tsp. salt 
1 c. bittersweet chocolate chips

Directions:
Preheat oven to 350 degrees F.
In the bowl of a stand mixer fitted with a paddle attachment, cream together butter and sugars until fluffy and light in color. Add egg and vanilla and blend in.

Mix in flour, cornstarch, baking soda and salt. Stir in chocolate chunks.

Using a standard-sized cookie scoop or tablespoon, drop dough onto a prepared baking sheet.  Bake for 8-10 minutes, until barely golden brown around the edges.  (The tops will not brown, but do NOT cook longer than ten minutes.)

Let cool, on the sheet, on a wire rack for five minutes.  Remove from baking sheet and let cool completely.  Try not to eat them all.

barely adapted from Anna Olson, Food Network Canada

Homemade Halloween Oreo Cookies


I've been looking at food blogs a lot and came a cross this easy to follow recipe. Made it last night and thought they were really yummy. There such cute cookies specially if you have kids or are going to any Halloween parties. This would be a great recipe for that!
To make them even more prefect for Halloween I divided the cream filling and added green and orange food coloring. You can add any other colors you may like for instances purple or red would be great too. Any thing that screams Halloween! Or you don't even need to add any coloring to the filling. You can leave it just plain white to give it that Oreo effect!
Recipe below!
 
Enjoy!
Homemade Halloween Oreo Cookies
Ingredients:
For the cookies: 
1 1/4 cups all-purpose flour
1/2 cup unsweetened or Dutch process cocoa powder
1 tsp baking soda
1/4 tsp baking powder
1/4 tsp salt
1 to 1 1/2 cups sugar (Use 1 cup for a truer-to-original Oreo wafer or more sugar for a sweeter chocolate cookie) 
10 tbsp (1 stick + 2 tbsp) unsalted butter, at room temperature
1 large egg 

For the cream filling (white): 
4 tbsp (1/2 stick) unsalted butter, at room temperature
1/4 cup vegetable shortening
2 cups confectioners’ sugar, sifted
2 tsp vanilla extract Instructions: 
Preheat the oven to 375˚ F.  Line two baking sheets with silicone baking mats or parchment paper.
In a food processor or the bowl of an electric mixer, combine the flour, cocoa powder, baking soda, baking powder, salt, and sugar.  Mix briefly to combine.  Add the butter to the bowl and pulse or mix briefly to incorporate.  Add in the egg and mix until the dough forms a cohesive mass.
Scoop between 2 tsp to a scant tbsp of batter (depending on how large you want them) onto the baking sheet.  Continue scooping, spacing the dough balls a couple of inches apart.  With moistened fingers, gently press down on the dough balls to flatten slightly.  Bake for 9-11 minutes (closer to 9 minutes for smaller cookies), rotating the pans halfway through baking.  Transfer the baking sheets to a wire rack and let cool completely until the cookies are firm and set.  Be sure the cookies are completely cooled before filling.
To make the filling, combine the butter and shortening in the bowl of an electric mixer.  Beat on medium-high speed until smooth.  Add the confectioners’ sugar to the bowl and mix on low speed just until incorporated, then increase the speed to medium-high and beat until light and fluffy, about 2-3 minutes.  Blend in the vanilla extract.
To assemble the cookies, pair them up by size.  Use a pastry bag fitted with a plain round tip to pipe a swirl of filling onto the flat side of one cookie of each pair.  Sandwich together with the remaining cookie and press down so that the filling reaches the edges. Yield: 20 to 30 sandwich cookies, depending on the size

Source: Retro Desserts by Wayne Bachman

Chocolate Overdose Cake


The title is actually the name of this cake. All you chocolate lovers out there has got to make this cake! 

This is a delicious cake to bake for holidays, parties or birthdays . Everyone would love it, chocolate lovers that is! When I ate a slice I thought I died and gone to chocolate heaven!

It has three layers of chocolate goodness.

Frist layer (bottom) starts with a brownie recipe. Second layer (middle) chocolate mousse. Third layer (top) chocolate cake. The finishing topping is chocolate ganache!

That's all I have to say, cause the pictures says it all!


Enjoy!

Chocolate Overdose Cake
Ingredients:
For the brownie base:
1/2 cup plus 2 tbsp. cake flour
1/4 tsp. salt
1/2 tsp. baking powder
3 oz. unsweetened chocolate, chopped fine
6 tbsp. unsalted butter, cut into 6 pieces
1 1/8 cups sugar
2 large eggs
2 tsp. vanilla extract

For the chocolate mousse filling:
6 oz. semi-sweet chocolate, broken into 1/2-oz. pieces
1 7/8 cups heavy cream
1 tbsp. sugar

For the chocolate cake:
2 oz. unsweetened chocolate, coarsely chopped
1/8 cup Dutch-processed cocoa
1/4 cup hot water
7/8 cup sugar, divided
7/8 cups unbleached all-purpose flour
3/4 tsp. baking soda
1/2 tsp. salt
1/2 cup buttermilk
1 tsp. vanilla extract
2 large eggs
1 large egg yolk
6 tbsp. unsalted butter, soft

For the ganache:
1 1/2 cups heavy cream
2 tbsp. unsalted butter
18 oz. semisweet chocolate, broken into 1/2-oz. pieces

Directions:

To make the brownie base, line the bottom of a 9-inch springform pan with a round of parchment paper and spray the sides with nonstick cooking spray.  Center a rack in the oven and preheat to 325 degrees F.  In a medium bowl, combine the cake flour, salt and baking powder.  Stir with a fork to mix.  Melt the chocolate and butter in a large heatproof bowl set over a saucepan of almost-simmering water, stirring occasionally, until smooth.

When the chocolate mixture is completely smooth, remove the bowl from the saucepan and gradually whisk in the sugar.  Add the eggs one at a time, whisking after each addition until thoroughly combined.  Whisk in vanilla.  Add in the flour mixture in two additions, folding with a rubber spatula until completely homogenous.

Transfer the batter to the prepared pan and smooth with a spatula.  Set aside, prepare the cake batter, and bake the two layers at the same time.

To make the cake, line the bottom of a 9-inch round cake pan with a round of parchment paper.  Grease and flour the sides of the pan.  Combine the chocolate, cocoa and hot water in a medium heatproof bowl; set the bowl over a saucepan containing 1-inch of simmering water and stir with a rubber spatula until chocolate is melted, about 2 minutes.  (Note: at this point, my mixture was pretty thick and I thought I had ruined it, but mixing in the sugar was like magic and it made it smooth and liquidy again.)  Add 1/4 cup of sugar to the chocolate mixture and stir until thick and glossy, 1 to 2 minutes.  Remove bowl from heat and set aside to cool.

Whisk flour, baking soda and salt in a medium bowl; set aside.  Combine buttermilk and vanilla in a small bowl.

In the bowl of a stand mixer fitted with the whisk attachment, whisk the eggs and yolks on medium-low speed until combined, about 10 seconds.  Add remaining sugar, increase speed to high, and whisk until fluffy and lightened in color, 2 to 3 minutes.  Replace whisk with paddle attachment.

Add the cooled chocolate mixture to the egg/sugar mixture and mix on medium speed until thoroughly incorporated, 30-45 seconds, pausing to scrape down sides of bowl with rubber spatula as needed.  Add softened butter one tablespoon at a time, mixing about 10 seconds after each addition.  Add about one third of the flour mixture followed by half of the buttermilk mixture, mixing until incorporated after each addition (about 15 seconds).  Repeat using half of remaining flour mixture and all of remaining buttermilk mixture (batter may appear separated).  Scrape down the sides of the bowl and add remaining flour mixture; mix at medium-low speed until batter is thoroughly combined, about 15 seconds.  Remove bowl from mixer and fold batter once or twice with rubber spatula to incorporate any remaining flour.  Pour into prepared pan; smooth batter to edges of pan with an offset spatula.

Bake the brownie and cake layers at the same time: the brownie for 25-30 minutes and the cake for 30 minutes, or until a toothpick inserted in the center of each comes out clean.  Transfer the pans to a wire cooling rack.  Allow the brownie to cool completely in the pan.  Allow the cake to cool in the pan for 15 minutes, then invert onto the wire rack and allow to cool completely.

Once the brownie layer has cooled, run a knife around the edges to separate it from the pan.  Remove the sides of the springform but leave the brownie layer on the springform base.  Form a ring of parchment paper around the brownie layer and extending up the sides of the springform pan – reclose the springform so that the parchment is fitted tightly to the sides.

To make the chocolate mousse filling, place a stand mixer bowl and whisk attachment in the freezer or fridge.  Heat 1-inch of water in the bottom half of a double boiler over medium heat.  Place the semisweet chocolate in the top half of the double boiler.  Tightly cover the top with plastic wrap and allow to heat for 8-10 minutes.  Remove from the heat and stir until smooth.  Transfer the melted chocolate to a stainless steel bowl and set aside until needed.

Place heavy cream and sugar in the well-chilled bowl of an electric mixer fitted with the chilled whisk attachment.  Whisk on high speed until stiff peaks form, about 1 1/2 minutes.  Remove the bowl from the mixer.  By hand, whisk to combine 1/4 of the whipped cream into the melted chocolate until smooth and completely incorporated.  Add the combined whipped cream and chocolate to the remaining whipped cream and use a rubber spatula to fold together.

Spread the mousse over the top of the brownie base evenly.  Use an offset spatula to smooth the top.  Place the cooled cake round over the mousse, pressing down lightly.  Chill for at least 1 hour.

To make the ganache, heat the heavy cream and the butter in a saucepan over medium high heat.  Bring to a boil.  Place the semisweet chocolate in a 3-quart stainless steel bowl.  Pour the boiling cream over the chocolate and allow to stand for 5 minutes.  Stir until smooth.  Chill 1 cup of ganache for 1 hour.  Allow the remaining ganache to come to room temperature (about 40 minutes).

Remove the springform ring and parchment collar from the assembled cake.  Carefully transfer the cake to a serving platter, removing the springform base and parchment round.  Use a spatula to smooth the room temperature ganache over the cake top and sides, covering evenly.

Place the chilled ganache in a pastry bag fitted with a shell tip and pipe a shell border around the base of the cake.  Pipe 12-16 rosettes around the top of the cake to indicate servings.  Serve chilled and store leftovers in the fridge.  Cut the cake with a hot, dry knife.

Source: annies-eats & Confections of a Foodies Bride
Related Posts Plugin for WordPress, Blogger...