Showing posts with label Cake. Show all posts

Friday, February 1, 2013

Banana Cake with Cream Cheese Frosting


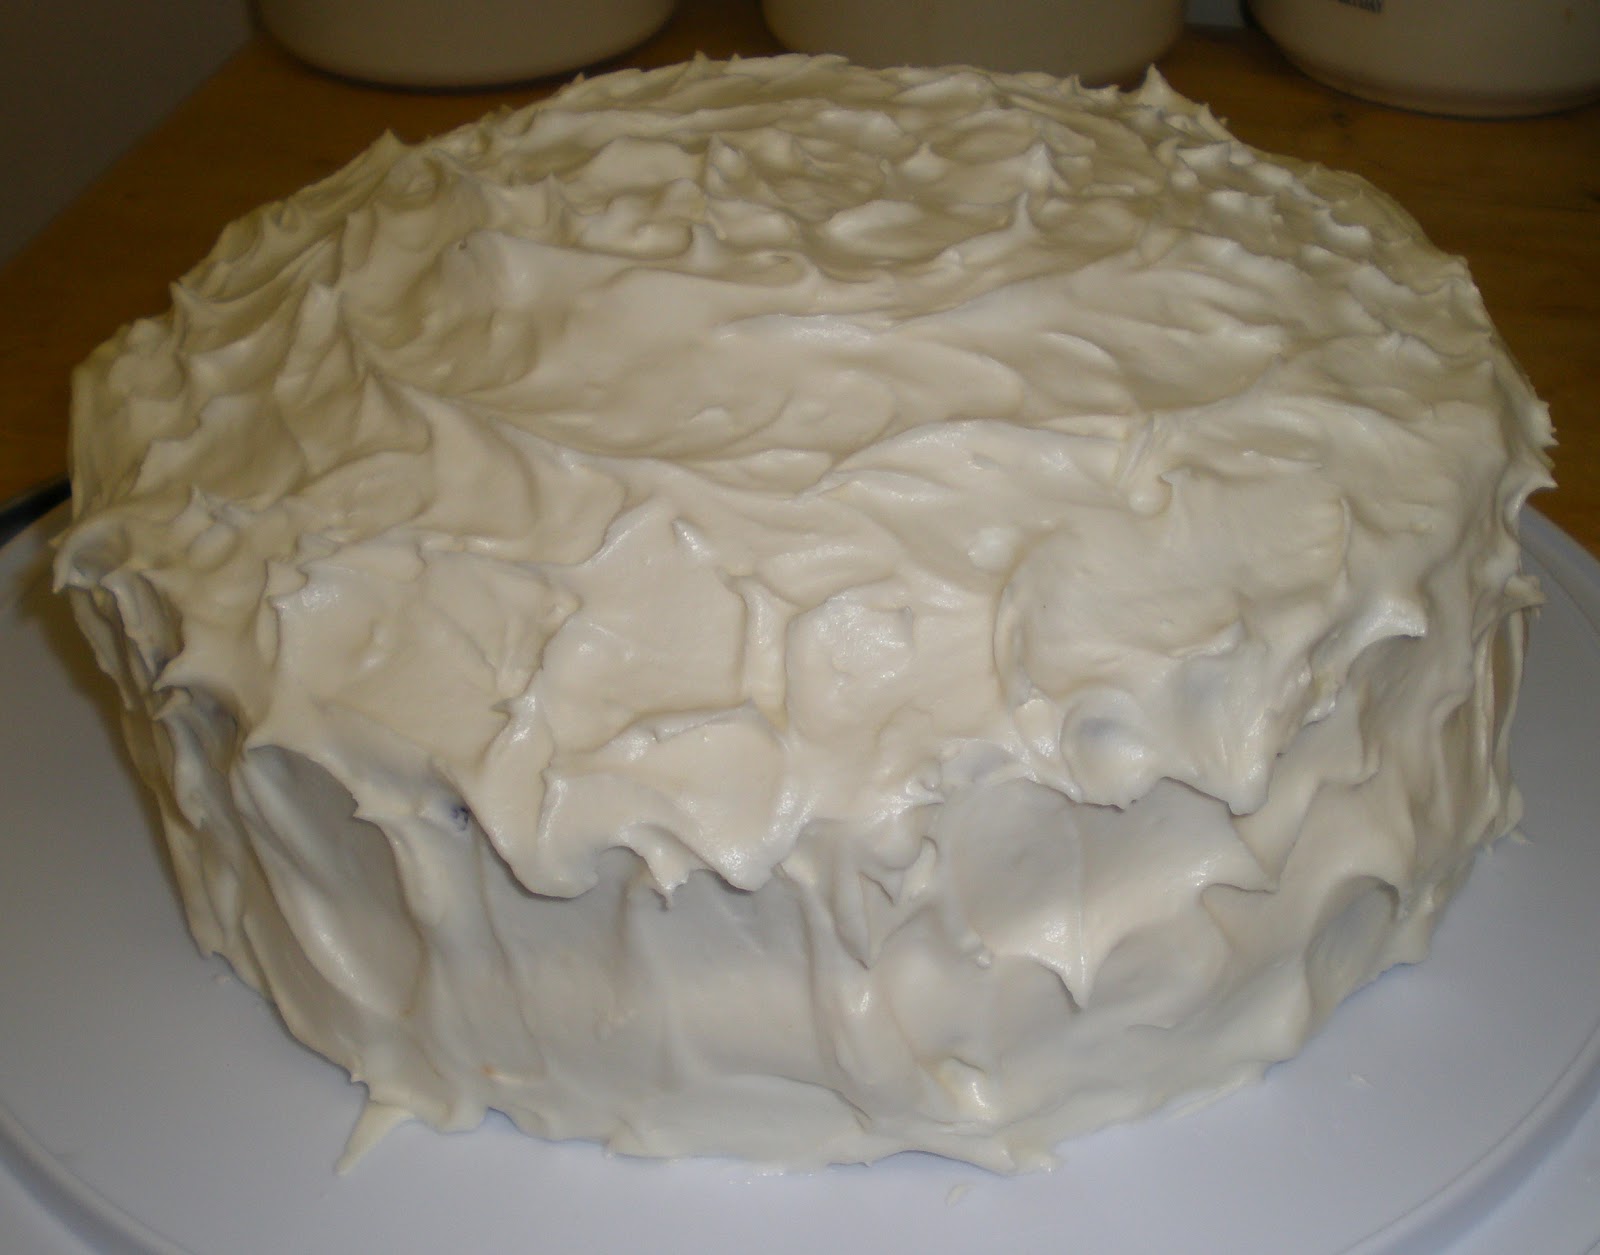
When there's ripe bananas in my kitchen then there's a banana bread or cake baking in my oven! I mostly bake banana bread (it's high demand in my house) but this this I wanted to try it in cake form. Banana + Cake = Cream Cheese Frosting! Oh Yeah! I love cream cheese frosting. You could spread that baby on just about anything. Or just plain cream cheese would also do it for me.

This cake is really delicious, light and super moist. It's pretty much fool proof, so it's real simple and easy to make. One piece just didn't cut it with me. I'm a cake, cupcake and cookie eater...Well I think it's known I'll eat just about anything!

Make it! Make it now!

Enjoy!

Banana Cake with Cream Cheese Frosting
Makes 8"x8" pan

Ingredients

Banana Cake
3/4 cup sugar
1/2 cup sour cream
2 eggs
3 tablespoons melted butter
2 mashed (over ripe) bananas (about 3/4 cup)
1 1/2 teaspoons vanilla extract
1 1/2 cups flour
1/2 teaspoon cinnamon
1/4 teaspoon salt
1/2 teaspoon baking soda
1 teaspoon baking powder

Cream Cheese Frosting
1/2 block (4 oz.) cream cheese
2 tablespoons butter, softened
2 cups powdered sugar
1 teaspoon vanilla
2 teaspoons milk or cream, if needed to thin frosting for easy spreading.
1/4 cup chopped, toasted walnuts (optional)
  
Directions

Preheat oven to 375*F. Grease an 8"x8" pan (with butter or non-stick cooking spray).
 
In a large bowl, whisk together sugar, sour cream, eggs, melted butter, mashed banana and vanilla. Whisk (can be done by hand, or with electric mixer) until fully combined.
Add flour, cinnamon, salt, baking soda and baking powder, and stir with whisk or spoon until fully combined and smooth.

Pour batter into prepared pan, and bake at 375*F for about 30 minutes (check after 25 minutes). Bake until a toothpick inserted in the center comes out clean, or with a few moist crumbs, but no wet batter.
Cool (in pan) on wire rack.
 
In the bowl of an electric mixer, or with an electric hand mixer, beat butter and cream cheese until smooth. Slowly add powdered sugar, then add vanilla. Add milk or cream, if needed to thin frosting for easy spreading.

Spread frosting onto cooled cake (make sure the cake is cool, or the frosting will melt).
Top cake with chopped, toasted nuts, if desired.

Source: Glorious Treats

Thursday, November 15, 2012

Chocolate Birthday Cake with Whipped Vanilla Frosting


How could I totally forget to write a blog post about this delicious Chocolate Birthday Cake! Well let me get started then!

It was my best friends birthday about a month ago and I asked her what kind of cake she wanted? She said she didn't want a cake. I was like "What?". Everybody deserves a cake for there birthday, right? Plus birthdays give me a great excuse to bake a new cake recipe! So I tried again, and asked her what she wanted instead. Her answer...Banana Bread. I told her no problem, so I made one plus a cake. I very pink cake if I might add. A very pink cake with Whipped Vanilla Frosting (that taste like ice cream!)


 The cake it self is very moist chocolate cake. It's super delicious, together with the frosting makes an awesome combination. I got this cake recipe from Sweetapolita. I used her Chocolate Birthday Cupcakes recipe 3-times the batch. Each batch makes 1 (8-inch round layer).


For the Whipped Vanilla Frosting I used her frosting recipe from her Vanilla Birthday Cake. The frosting is super creamy. Almost taste like ice cream! I'm all for frosting that taste like ice cream! This frosting also pipes really nice. I used Ateco #849 for the top border and Wilton #2D for the bottom border. At the time I didn't have a cake spatula, so I had no choice but to use a butter knife. It would have came out a lot cleaner with an angled spatula. To ahieve pink frosting I used a few drop of AmeriColor Gel Paste in Electric Pink. Don't forget every pink cake needs to be dressed up in sprinkles! Go on, don't be shy...pile tons of it on!


Over all this cake turned out great. It was a huge hit on her birthday. She end up loving it and the Banana Bread!

Enjoy!

Chocolate Cake
(make 3-times this recipe for 3, 8-inch round pan)

Ingredients:
For Cake Layer
3/4 cup (95 g) all-purpose flour
3/4 cup (150 g) white sugar
1/4 cup (30 g) dark cocoa powder
3/4 teaspoon (3.5 g) baking soda
3/4 teaspoon (3.5 g) baking powder
3/4 teaspoon (3.5 g) cornstarch
1/2 teaspoon (4 g) salt
1/3 cup (80 mL) buttermilk
1/4 cup (60 mL) brewed coffee or espresso, hot
3 tablespoons (45 ml) vegetable oil
1 egg, room temperature, lightly beaten
1-1/2 teaspoons (7.5 mL) pure vanilla extract 

Directions:

Preheat oven to 350° F and line a muffin/cupcake pan with your favourite cupcake liners.

In the bowl of electric mixer fitted with the paddle attachment, sift flour, sugar, cocoa powder, baking soda, baking powder, cornstarch and salt.

In a medium bowl or measuring cup, combine the buttermilk, coffee, oil, egg and vanilla.

Add liquid mixture to dry ingredients and mix for 2 minutes on medium speed (you may need the plastic splashguard that comes with mixer), Divide batter among (2/3 full or just less) liners. Batter will be liquidy, and cupcakes will rise.

Bake for 15-17 minutes, or until toothpick or skewer comes out with a few crumbs. Try not to over-bake. Carefully remove cupcakes from the pan immediately (it's hot!), and place them on a wire rack until completely cool. 

Source: Sweetapolita

For the Whipped Vanilla Frosting 

2-1/2 cups (5 sticks)(575 grams) unsalted butter, softened and cut into cubes
5-1/4 cups (600 grams) confectioners’ sugar, sifted 
4-1/2 tablespoons (70 mL) milk
1-1/2 tablespoons (23 mL) pure vanilla extract
pinch or two of salt
few drops pink gel colour
pastel sugar pearls, or any other sprinkles for decorating

Directions:

In the bowl of an electric mixer fitted with the paddle attachment, whip butter for 8 minutes on medium speed (I use “4″ on my KitchenAid). Butter will become very pale & creamy.

Add remaining ingredients and mix on low-speed for 1 minute, then on medium speed for 6 minutes. Frosting will be very light, creamy, and fluffy. If you want all of your frosting (for filling and frosting cake) pink, then add a drop of pink gel colour and mix again, adding one drop at a time until desired pink shade is achieved (see notes). If you want just the outside of the cake pink, you will fill the cake layers first, and then colour the remaining frosting pink.

Best used right away (for ideal spreading consistency), but keeps well once frosted. 

Source: Sweetapolita


Thursday, October 25, 2012

Chocolate Peanut Butter Layer Cake


I've always loved to bake birthday cakes for my family and friends. One of my dearest friend's birthday was coming up and I was having a bit of trouble deciding on what type of cake to bake for her. But as I thought I remembered her loving peanut butter. Peanut butter goes great with chocolate so I googled for a chocolate peanut butter cake recipe and came across this one from Annie's Eats Blog. I've made lots of recipes from her blog so I was super excited to give this cake a try!


The cake it self is delicious and very moist, so be careful when trying to assemble the cake layers. One of my layers broke in half, but it was okay cause once the cake layers come together, you wont noticed it. ~_^


This cake is absolutely delicious! The frosting is super yummy. It taste like peanut butter whipped cream! If you love peanut butter, you'll love this cake. This cake would be great for Halloween! Make it! You wont regret it!

Enjoy!

Chocolate Peanut Butter Layer Cake

Thursday, June 28, 2012

Ruffled Chocolate Celebration Cake


For my dad's birthday I wanted to make something with Buttercream and Chocolate. My dad loves chocolate so I thought this recipe would be a really great choice! Oh boy was it! I must say this is the most beautiful cake I have ever made! Also this was my first time piping ruffles on a cake and I think I did a good job! So proud of myself...hee hee Makes me want to buy some more decorating tips so I can make some other designs.

This recipe came from Sweetapolita's site. She did an amazing job! It's super pretty and I love how she made it pink! I didn't want to do that with this cake...well who am I kidding I did! But I held back and use a Royal Blue Gel Color. I used about two small drops. Maybe the next cake will be pink! ^_^


Since this was my first time piping ruffles I went on youtube and checked out some tutorials on ruffling. It makes it so much easier. I used a Wilton Decorating Petal Icing Tip #123 for the ruffles and AmeriColor Gel Paste in Royal Blue. Also I didn't have Cacao Barry Cocoa Powder – Extra Dark so I used Hershey's Unsweetened Cocoa.


This Chocolate cake was really moist and delicious. The buttercream was super rich and creamy. The two worked really well with each other. I really can't wait to make this cake again!


Happy Birthday Dad!

Enjoy!

Rich & Dark Chocolate Cake
Source: Sweetapolita

Ingredients
1 3/4 cups all-purpose flour
2 cups granulated sugar
3/4 cup Cacao Barry Cocoa Powder – Extra Dark
2 teaspoons baking soda
1 teaspoon baking powder
1 teaspoon salt
2 eggs
1 cup strong black coffee (can be hot)
1 cup buttermilk, room temperature
1/2 cup vegetable oil
1 tablespoon pure vanilla extract

Method
Preheat oven to 350 F. Prepare 2 x 9″ (or 3 x 8″ for slightly shorter layers) cake pans with butter and flour or parchment paper. In bowl of electric mixer, sift all dry ingredients. Add all remaning ingredients to bowl with the dry ingredients and with paddle attachment on mixer, mix for 2 minutes on medium speed (you may need the plastic splashguard that comes with mixer) and pour into prepared pans. Batter will be liquidy.

Bake for 20 minutes and rotate pans in oven. Cakes are done when toothpick or skewer comes clean–approximately 35 minutes. Try not to overbake. Cool on wire racks for 20 minutes then gently invert onto racks until completely cool. 

Swiss Meringue Buttercream   
Source: adapted from Martha Stewart.
Sweetapolita's Notes:      
Just a note that you will need approximately 3 times the Swiss Meringue Buttercream recipe for this Rich & Ruffly cake. Because it does take some time to make, I always make in batches of 3, because it freezes so well and saves time.

Ingredients
5 large egg whites (30g each–total 150g)
1 cup plus 2 tablespoons superfine granulated sugar
1 pound (4 sticks) unsalted butter, softened, cut into cubes
2 teaspoons pure vanilla extract
Pinch of salt

Method
Wipe the bowl of an electric mixer with paper towel and vinegar, to remove any trace of grease. Add egg whites and sugar,  and simmer over a pot of water (not boiling), whisking constantly, until temperature reaches 140 degrees F, or if you don’t have a candy thermometer, until the sugar has completely dissolved and the egg whites are hot.

With whisk attachment of mixer, begin to whip until the mixture is thick, glossy, and cool. Switch over to paddle attachment and, while mixing on medium speed continously, add softened butter in chunks until incorporated, and mix until it has reached a silky smooth texture (if curdles, keep mixing and it will come back to smooth).  Add vanilla and salt, mix well. You can also add a wide variety of flavourings, extracts, and more.

Keep in airtight container in refrigerator for up to one week, leaving out at room temperature when needed, rewhipping in mixer for 5 minutes.

Can freeze for up to 6-8 weeks.

Makes approximately 5 cups of buttercream.

Thursday, June 14, 2012

Blueberry Buckle Cake


I love blueberries! Well I love all berries but my favorite would have to be blueberries. I also love Crumb Cake, so when I thought, Hey! Let me find a recipe that I can add blueberries to crumb cake! So I searched online and found this recipe from Two Peas and Their Pod. This recipe was slightly adapted from King Arthur Flour. 

This Blueberry Buckle Cake is super moist and delicious. I know I say that a lot about other treats but I'm not lying when I give my opinion on things. Before I knew it this cake was gone! My boyfriend really enjoyed it and is asking me to make another one. I will as soon as I buy some more blueberries. Oh and I used fresh blueberries in this recipe not frozen, but you can use frozen. I also used coconut milk instead of buttermilk because my boyfriend is Lactose Intolerance. It seems he can handle coconut milk without getting an allergic reaction.


I baked this on a 9-inch cake pan. As the cake was baking my home was smelling so good, like cinnamon and berries. I would bake this again just for the smell alone...lol


What I also love about cakes like this one is not only the blueberries but the crust on top of this baby! You get that crispness on the top and soft and moist on the bottom.


Definitely give this recipe a try and if you don't like blueberries that okay, you can add any other berries that you might enjoy. This is also good without any berries at all.

Enjoy!

Blueberry Buckle Cake
Yield: 8-10
Source: twopeasandtheirpod.com & slightly adapted from King Arthur Flour

Ingredients:
For the topping:
1/3 cup brown sugar
1/2 cup all-purpose flour
1 teaspoon cinnamon
1/4 cup butter

For the batter:
2 cups all-purpose flour
2 teaspoons baking powder
1/2 teaspoon salt
3/4 cup granulated sugar
1/4 cup butter
1 large egg
1 teaspoon vanilla extract
1/2 cup buttermilk (I used coconut milk)
2 cups fresh or frozen blueberries

Directions:
Preheat oven to 375 F. Grease a 9-inch cake pan and set aside

To make the topping: In a small bowl, mix together brown sugar, flour, and cinnamon. Rub in the butter using your finger tips until the mixture is crumbly. Set the topping aside.

To make the batter: In a medium bowl, whisk together flour, baking powder, and salt. In the bowl of a stand mixer, cream together the sugar and butter. Add the egg and vanilla, mix until smooth. Alternately add the buttermilk and the flour mixture to the creamed mixture, ending with flour. Stir only enough to blend. Gently fold in the blueberries.

Pour the batter evenly into prepared cake pan. Sprinkle the topping over the batter and bake for 40 to 45 minutes or until a toothpick comes out clean. Let the buckle cool for 10 minutes. Loosen the side with a knife. Holding the cake pan in your left hand, gently tip the cake out onto your right hand, remove the pan, and gently place the cake onto a  serving dish.

Monday, May 7, 2012

Fluffy Vanilla Cake with Whipped Vanilla Bean Frosting


To celebrate my mom's birthday this year, I decided to bake something simple but delicious. So where do I go to find really good cake recipes? Sweetapolita of course! This is my second time baking a recipe off her site. The first were Vanilla {or Funfetti} Cupcakes {recipe here}, which were awesome! So when I read the post on this Fluffy Vanilla Cake, I just had to bake it! Oh boy was I glad!


 I have to say this was a fairly easy recipe to follow. The cake baked in just 22 minutes. I was surprised by that. If your planning on making this recipe do keep watch on not over baking this cake. I used a timer and set it for 20 minutes (like she states on her post).

This is a very delicious, light and fluffy cake. The Whipped Vanilla Bean Frosting is oh so yummy! It's light but just sweet enough and the vanilla bean just makes it even better! You can make this frosting without the vanilla bean but I wanted the full experience, so I went and order some on Azamon {vanilla beans I used}. I used 9" Wilton Cake Pans. I also added candy pearls around the edges of this cake. Looks super pretty right?


Everyone who celebrated my mother's birthday with me really enjoyed this cake. Before you knew it, it was gone! I regretted not having a second piece but I'm planning on baking this recipe again for my boyfriends birthday, which is in a few days! Can't wait to have another piece yet again! ^_^

This is the yummiest Vanilla Cake I have ever had! Please visit Sweetapolita {recipe here} for a more in depth instructions on achieving this delicious cake and many others!

Enjoy!

Fluffy Vanilla Cake
Yield: One 2-layer, 8-inch round cake

Ingredients:
5 large egg whites (5 ounces/150 grams) at room temperature
3/4 cup whole milk (180 mL/6 liquid ounces), at room temperature
2 1/4 teaspoons pure vanilla extract (9 grams)
2 3/4 cups cake flour, sifted (11 ounces/315 grams)
1 3/4 cups sugar (12 ounces/350 grams)
1 tablespoon + 1 teaspoon baking powder (19.5 grams)
3/4 teaspoon salt (5 grams)
12 tablespoons unsalted butter (6 ounces/170 grams), at room temperature and cut into cubes

Directions:
Preheat oven to 350°F (180°C). Grease, line with parchment, and flour two round 8-inch pans.

In a medium bowl or measuring cup, combine and stir the egg whites, 1/4 cup of milk, and the vanilla. Set aside.

In the bowl of an electric mixer fitted with the paddle attachment, combine the dry ingredients together on low speed (I use the “stir” setting on my mixer) for 30 seconds.

Add the butter and remaining 1/2 cup of milk, and mix on low speed until just moistened. Increase to medium speed and mix for 1 1/2 minutes.

Scrape the sides of the bowl and begin to add the egg mixture in 3 separate batches; beat on medium speed for 20 seconds after each addition.

Divide the batter in two, spreading it evenly with a small offset palette knife. If you have a kitchen scale, weigh to ensure 2 even layers.

Bake 25-35 minutes or until a cake tester comes clean when inserted into the center. Be so careful to not over bake. Check cake at 20 minutes, but not before, and once you feel it’s almost ready, set the timer for 2 minute intervals. Let cool on racks for 10 minutes before loosening the sides with a small metal spatula, and invert onto greased wire racks. Gently turn cakes back up, so the tops are up and cool completely.

Wrap tightly and store at room temperature for up to 2 days, refrigerator for up to 5 days, or frozen for up to 2 months. Best eaten the same day as baked.

Whipped Vanilla Bean Frosting
Source: Sweetapolita & Adapted from Donna Hay

Ingredients:
3 sticks + 2 tablespoons (375 grams/13 ounces) unsalted butter, softened and cut into cubes
3 cups sifted (480 grams/1 lb + 1 ounce) confectioners’ sugar (icing, powdered)
3 tablespoons (45 mL) milk
1 vanilla bean, scraped
1 teaspoon (5 mL) pure vanilla extract
pinch of salt

Directions:
In the bowl of an electric mixer fitted with the paddle attachment, whip butter for 8 minutes on medium speed (I use “4″ on my KitchenAid). Butter will become very pale & creamy.

Add remaining ingredients and mix on low speed for 1 minute, then on medium speed for 6 minutes. Frosting will be very light, creamy, and fluffy.

Best used right away.

You can eliminate the vanilla bean and use a total of 1 1/2 teaspoons of pure vanilla extract.

Sunday, April 8, 2012

Happy Easter & Carrot Cake


Happy Easter! 

How are you enjoying your Easter Sunday? Oh me I'm just sitting here at home watching Being Human with a slice of Carrot Cake. Which I must say is really delicious. I had my share of Carrot Cakes and this is really, really good! I had a bit of trouble with the cream cheese frosting. It wasn't thick enough to my liking, so I started all over and this time it came out just right. It's not the pretties frosting technique but then again cream cheese frosting is always hard for me to work with.


This Carrot Cake is sure damn good! I was afraid of the frosting melting so I stored it in the fridge. I don't know about you but I kinda like my cakes chilled. I love raisins and pecans, so this is my first time adding them in Carrot Cake. Boy was I missing out! The raisins are plump and kept the cake very moist. The pecans were also soft to the bite.


All over I'm in love with this recipe! Super moist and delicious. If you didn't know my favorite kind of cake is Carrot, maybe I should have said that from the beginning...Any who you have got to make this cake, that is if you love carrots like me.

This recipe I got from Sticky Gooey Creamy Chewy Blog. You can also find this recipe at Zoe Bakes site. It was adapted from The Essential Baker.

Ultimate Carrot Cake 
Source: adapted from The Essential Baker, Zoe Bakes via Sticky Gooey Creamy Chewy Blog

Ingredients:
2 1/4 cups all-purpose flour
1 1/2 teaspoons baking powder
1 teaspoon baking soda
1 teaspoon ground cinnamon
1/4 teaspoon ground ginger
1/2 teaspoon salt
1/4 teaspoon ground nutmeg
4 extra large eggs, at room temperature
1 1/2 cups sugar
1 cup canola oil
1/2 cup buttermilk
2/3 cups firmly packed brown sugar
2 teaspoons pure vanilla extract
1/2 cup crushed pineapple, drained
1 pound finely grated carrots
1 cup toasted chopped pecans
1 cup golden raisins
1 batch Cream Cheese Frosting (recipe follows)


Directions:

Preheat oven to 350 degrees F.

Prepare two 9-inch cake pans by lightly coating with oil and lining with parchment paper.

Whisk the flour, baking powder, baking soda, cinnamon, ginger, salt and nutmeg together in a bowl.  Set aside.

Mix the eggs, sugar, oil, buttermilk, brown sugar, vanilla, and pineapple together in a large bowl. Add the dry ingredients to the wet ingredients and mix until fully incorporated.   Stir in the carrots, pecans and raisins just until evenly distributed throughout the batter.

Pour the batter into the prepared pans and bake on the center rack for about 35-40 minutes, or until a toothpick or cake tester comes out clean.

Cool cakes in their pans for at least 30 minutes before attempting to remove them.  Then, removed from the pans and peel off the parchment paper.  Continue to cool the cakes completely before frosting.

To assemble the cake, place the bottom layer on a cardboard round or other flat surface and put on a cake turntable. Scoop about 1 1/2 cups of the cream cheese icing onto the top of the bottom cake layer.  Using an offset spatula, spread the frosting evenly over the surface.  Carefully place the second layer on top.  Scoop another 1 1/2 cups or so of the frosting on the top of the cake and spread evenly, easing the frosting down the sides.  Spread the icing around the sides of the cake, adding more as needed.  Lift the cake off the turn table and place on a cake stand or platter and chill a bit to firm up the frosting before slicing.


SGCC’S Favorite Cream Cheese Frosting

Ingredients:
16 ounces cream cheese, softened
4 ounces (1 stick) unsalted butter, softened
2 teaspoons pure vanilla extract
1 teaspoon orange extract
3-4 cups confectioners’ sugar to taste

Directions:

Beat cream cheese and butter together until smooth.  Add extracts and beat just until incorporated.  Beat in sugar, one cup at a time, until frosting has the flavor and consistency you want.  You may not need to add all of the sugar.

Thursday, March 8, 2012

Angel Food Cake with Vanilla Strawberries


This has been my second time baking an Angel Food Cake, and what I can say that it's still a bit hard for me to bake. But I pulled through! I think I did a pretty good job, cause I thought when I took this cake out the oven it was ruin! But as I let it rest and removed it from the tube pan, I was relieved that it came out good!


Angel Food Cake is a super light and delicious cake. One slice just wouldn't be enough. You would have to have another. The strawberries is a must-have for this recipe. If you prefer, you can add whip cream to each slice of this cake.


If your not so sure about making this cake, do your research first. So you can at least achieve a great cake. 

Good Luck!

Angel Food Cake with Vanilla Strawberries

Ingredients

1 3/4 cup granulated sugar
1/4 teaspoon salt
1 cup cake flour, sifted
12 large egg whites, at room temperature
1/3 cup warm water
1 teaspoon vanilla extract, or 1/4 teaspoon almond extract
1 1/2 teaspoons cream of tartar
1 pint fresh strawberries
2 to 4 teaspoons granulated sugar (depending on how sweet your berries are)
1/2 scraped vanilla bean

Directions

Place a rack in the center of the oven and preheat oven to 350 degrees F.

In the bowl of a food processor, fitted with the blade attachment, grind sugar for about 2 minutes. This will help create a super fine sugar that will be better absorbed into the egg whites.

Place half of the sugar in a small bowl.

In a large bowl, sift together the remaining sugar, salt, and cake flour.  Set aside.
In the bowl of an electric stand mixer, fitted with a whisk attachment, beat together the egg whites, water, extract, and cream of tartar medium speed.  If you’re worried that the cream of tartar is too chunky… don’t worry, it’ll smooth itself out.  Beat on medium high, gradually adding the sugar from the small bowl, until medium (not stiff) peaks form.  The meringue will hold a trail of the beaters through it, be glossy, and won’t be overly foamy.

Remove the bowl from the mixer and sift in one quarter of the flour and sugar mixture.  Fold with a spatula.  Try to avoid stirring the mixture too much.  Instead, sweep the egg whites from the bottom of the bowl to the top, incorporating the flour.  Add flour mixture in three more batches.  Fold until thoroughly combine, but don’t overmix or deflate the egg whites.

Spoon battering into an ungreased tube pan.  Ungreased in is important, as it will help the cake rise. 
The tube pan will be full.

Bake for 45 to 50 minutes, or until a skewer inserted in the cake comes out clean.  Remove cake from the oven and carefully invert upside down, propped up on a bottle.  This cake cools upside down.  Let rest for at least an hour before trying to remove from the pan.

Slice strawberries and mix with sugar and vanilla bean.  Let rest in the fridge to create juices while the cake cools.

As the cake cools, it will begin to pull away from the sides of the pan.  To remove from the pan, tap the pan with a butter knife, or carefully run a butter knife around the edges between the cake and the pan.

Serve with berries and cream.

Cake will last, well wrapped at room temperature, for up to 3 days.

Monday, January 23, 2012

Grandma's Cherry Cheesecake


My closest friends gave me there late Grandmothers Cherry Cheesecake Recipe. They knew how much I love to bake and how close we are that they trusted me to keep this recipe sacred. I'm very proud to have this recipe passed down to me. So happy to finally have a cheesecake recipe I can make for my family and friends. This is such a creamy cake and I just love the added cherries on the top.

This is just one recipe I will not be able to share, but there's lots of other great Cheesecake Recipes out there!


Wednesday, December 28, 2011

New York-Style Crumb Cake


It's been a long time since I had crumb cake. I can't think of a time if I ever baked one. I usually get the one from Entemann's and there cakes are pretty good. But since I love baking and always love trying out new recipes I decided to give this New York-Style Crumb Cake a try. It's definitely a plus that I'm a true New Yorker and I know how we love our crumb cakes! Extra crumby! lol Okay that was corny anyways...


This recipe calls for cake flour. I didn't have any on hand and I didn't want to go out in this freezing cold 26 degree weather in Elmira N.Y. So I used all-purpose flour. I know I wasn't suppose too but I just really wanted crumb cake with my coffee. So I made it with the flour and yes it did come out dry but besides that it was very delicious. I definitely will be giving this recipe another try with the cake flour. I had a piece with hot cocoa last night and a piece for breakfast!

Enjoy!

**Update**


I gave this recipe another try but this time with cake flour, and omg it taste so much better. It came out so moist not dry. So if you decide to give this recipe a go please us the cake flour, it makes a big differences!


New York-Style Crumb Cake

Source: Cooks’ Illustrated free iPhone app and Cooks’ Illustrated May 2007
Don’t be tempted to substitute all-purpose flour for the cake flour, as doing so will make a dry, tough cake. If you can’t find buttermilk, you can substitute an equal amount of plain, low-fat yogurt. When topping the cake, take care to not push the crumbs into the batter. This recipe can be easily doubled and baked in a 13 by 9-inch baking dish. If doubling, increase the baking time to about 45 minutes. Cooled leftovers can be wrapped in plastic wrap and stored at room temperature for up to 2 days.

For the Crumb Topping:
1/3 cup granulated sugar (2 2/3 ounces)
1/3 cup dark brown sugar (2 2/3 ounces)
3/4 teaspoon ground cinnamon
1/8 teaspoon table salt
8 tablespoons unsalted butter (1 stick), melted and still warm
1 3/4 cups cake flour (7 ounces)

For the Cake:
1 1/4 cups cake flour (5 ounces)
1/2 cup granulated sugar (3 1/2 ounces)
1/4 teaspoon baking soda
1/4 teaspoon table salt
6 tablespoons unsalted butter (3/4 stick), cut into 6 pieces, softened but still cool
1 large egg
1 large egg yolk
1 teaspoon vanilla extract
1/3 cup buttermilk
Confectioners’ sugar for dusting

To make the topping: Whisk sugars, cinnamon, salt, and butter in medium bowl to combine. Add flour and stir with rubber spatula or wooden spoon until mixture resembles thick, cohesive dough; set aside to cool to room temperature, 10 to 15 minutes.

To make the cake: Adjust oven rack to upper-middle position and heat oven to 325 degrees. Cut 16-inch length parchment paper or aluminum foil and fold lengthwise to 7-inch width. Spray 8-inch square baking dish with nonstick cooking spray and fit parchment into dish, pushing it into corners and up sides; allow excess to overhang edges of dish.

In bowl of standing mixer fitted with paddle attachment, mix flour, sugar, baking soda, and salt on low speed to combine. With mixer running at low speed, add butter one piece at a time; continue beating until mixture resembles moist crumbs, with no visible butter chunks remaining, 1 to 2 minutes. Add egg, yolk, vanilla, and buttermilk; beat on medium-high speed until light and fluffy, about 1 minute, scraping once if necessary.

Transfer batter to baking pan; using rubber spatula, spread batter into even layer.  Break apart crumb topping into large pea-sized pieces between your thumb, pointer, and middle fingers and spread in even layer over batter, beginning with edges and then working toward center. Bake until crumbs are golden and wooden skewer inserted into center of cake comes out clean, 35 to 40 minutes. Cool on wire rack at least 30 minutes. Remove cake from pan by lifting parchment overhang. Dust with confectioners’ sugar just before serving.


Tuesday, December 20, 2011

Chocolate Overdose Cake


The title is actually the name of this cake. All you chocolate lovers out there has got to make this cake! 

This is a delicious cake to bake for holidays, parties or birthdays . Everyone would love it, chocolate lovers that is! When I ate a slice I thought I died and gone to chocolate heaven!

It has three layers of chocolate goodness.

Frist layer (bottom) starts with a brownie recipe. Second layer (middle) chocolate mousse. Third layer (top) chocolate cake. The finishing topping is chocolate ganache!

That's all I have to say, cause the pictures says it all!


Enjoy!

Chocolate Overdose Cake
Ingredients:
For the brownie base:
1/2 cup plus 2 tbsp. cake flour
1/4 tsp. salt
1/2 tsp. baking powder
3 oz. unsweetened chocolate, chopped fine
6 tbsp. unsalted butter, cut into 6 pieces
1 1/8 cups sugar
2 large eggs
2 tsp. vanilla extract

For the chocolate mousse filling:
6 oz. semi-sweet chocolate, broken into 1/2-oz. pieces
1 7/8 cups heavy cream
1 tbsp. sugar

For the chocolate cake:
2 oz. unsweetened chocolate, coarsely chopped
1/8 cup Dutch-processed cocoa
1/4 cup hot water
7/8 cup sugar, divided
7/8 cups unbleached all-purpose flour
3/4 tsp. baking soda
1/2 tsp. salt
1/2 cup buttermilk
1 tsp. vanilla extract
2 large eggs
1 large egg yolk
6 tbsp. unsalted butter, soft

For the ganache:
1 1/2 cups heavy cream
2 tbsp. unsalted butter
18 oz. semisweet chocolate, broken into 1/2-oz. pieces

Directions:

To make the brownie base, line the bottom of a 9-inch springform pan with a round of parchment paper and spray the sides with nonstick cooking spray.  Center a rack in the oven and preheat to 325 degrees F.  In a medium bowl, combine the cake flour, salt and baking powder.  Stir with a fork to mix.  Melt the chocolate and butter in a large heatproof bowl set over a saucepan of almost-simmering water, stirring occasionally, until smooth.

When the chocolate mixture is completely smooth, remove the bowl from the saucepan and gradually whisk in the sugar.  Add the eggs one at a time, whisking after each addition until thoroughly combined.  Whisk in vanilla.  Add in the flour mixture in two additions, folding with a rubber spatula until completely homogenous.

Transfer the batter to the prepared pan and smooth with a spatula.  Set aside, prepare the cake batter, and bake the two layers at the same time.

To make the cake, line the bottom of a 9-inch round cake pan with a round of parchment paper.  Grease and flour the sides of the pan.  Combine the chocolate, cocoa and hot water in a medium heatproof bowl; set the bowl over a saucepan containing 1-inch of simmering water and stir with a rubber spatula until chocolate is melted, about 2 minutes.  (Note: at this point, my mixture was pretty thick and I thought I had ruined it, but mixing in the sugar was like magic and it made it smooth and liquidy again.)  Add 1/4 cup of sugar to the chocolate mixture and stir until thick and glossy, 1 to 2 minutes.  Remove bowl from heat and set aside to cool.

Whisk flour, baking soda and salt in a medium bowl; set aside.  Combine buttermilk and vanilla in a small bowl.

In the bowl of a stand mixer fitted with the whisk attachment, whisk the eggs and yolks on medium-low speed until combined, about 10 seconds.  Add remaining sugar, increase speed to high, and whisk until fluffy and lightened in color, 2 to 3 minutes.  Replace whisk with paddle attachment.

Add the cooled chocolate mixture to the egg/sugar mixture and mix on medium speed until thoroughly incorporated, 30-45 seconds, pausing to scrape down sides of bowl with rubber spatula as needed.  Add softened butter one tablespoon at a time, mixing about 10 seconds after each addition.  Add about one third of the flour mixture followed by half of the buttermilk mixture, mixing until incorporated after each addition (about 15 seconds).  Repeat using half of remaining flour mixture and all of remaining buttermilk mixture (batter may appear separated).  Scrape down the sides of the bowl and add remaining flour mixture; mix at medium-low speed until batter is thoroughly combined, about 15 seconds.  Remove bowl from mixer and fold batter once or twice with rubber spatula to incorporate any remaining flour.  Pour into prepared pan; smooth batter to edges of pan with an offset spatula.

Bake the brownie and cake layers at the same time: the brownie for 25-30 minutes and the cake for 30 minutes, or until a toothpick inserted in the center of each comes out clean.  Transfer the pans to a wire cooling rack.  Allow the brownie to cool completely in the pan.  Allow the cake to cool in the pan for 15 minutes, then invert onto the wire rack and allow to cool completely.

Once the brownie layer has cooled, run a knife around the edges to separate it from the pan.  Remove the sides of the springform but leave the brownie layer on the springform base.  Form a ring of parchment paper around the brownie layer and extending up the sides of the springform pan – reclose the springform so that the parchment is fitted tightly to the sides.

To make the chocolate mousse filling, place a stand mixer bowl and whisk attachment in the freezer or fridge.  Heat 1-inch of water in the bottom half of a double boiler over medium heat.  Place the semisweet chocolate in the top half of the double boiler.  Tightly cover the top with plastic wrap and allow to heat for 8-10 minutes.  Remove from the heat and stir until smooth.  Transfer the melted chocolate to a stainless steel bowl and set aside until needed.

Place heavy cream and sugar in the well-chilled bowl of an electric mixer fitted with the chilled whisk attachment.  Whisk on high speed until stiff peaks form, about 1 1/2 minutes.  Remove the bowl from the mixer.  By hand, whisk to combine 1/4 of the whipped cream into the melted chocolate until smooth and completely incorporated.  Add the combined whipped cream and chocolate to the remaining whipped cream and use a rubber spatula to fold together.

Spread the mousse over the top of the brownie base evenly.  Use an offset spatula to smooth the top.  Place the cooled cake round over the mousse, pressing down lightly.  Chill for at least 1 hour.

To make the ganache, heat the heavy cream and the butter in a saucepan over medium high heat.  Bring to a boil.  Place the semisweet chocolate in a 3-quart stainless steel bowl.  Pour the boiling cream over the chocolate and allow to stand for 5 minutes.  Stir until smooth.  Chill 1 cup of ganache for 1 hour.  Allow the remaining ganache to come to room temperature (about 40 minutes).

Remove the springform ring and parchment collar from the assembled cake.  Carefully transfer the cake to a serving platter, removing the springform base and parchment round.  Use a spatula to smooth the room temperature ganache over the cake top and sides, covering evenly.

Place the chilled ganache in a pastry bag fitted with a shell tip and pipe a shell border around the base of the cake.  Pipe 12-16 rosettes around the top of the cake to indicate servings.  Serve chilled and store leftovers in the fridge.  Cut the cake with a hot, dry knife.

Source: annies-eats & Confections of a Foodies Bride
Related Posts Plugin for WordPress, Blogger...