Sunday, April 8, 2012

Happy Easter & Carrot Cake


Happy Easter! 

How are you enjoying your Easter Sunday? Oh me I'm just sitting here at home watching Being Human with a slice of Carrot Cake. Which I must say is really delicious. I had my share of Carrot Cakes and this is really, really good! I had a bit of trouble with the cream cheese frosting. It wasn't thick enough to my liking, so I started all over and this time it came out just right. It's not the pretties frosting technique but then again cream cheese frosting is always hard for me to work with.


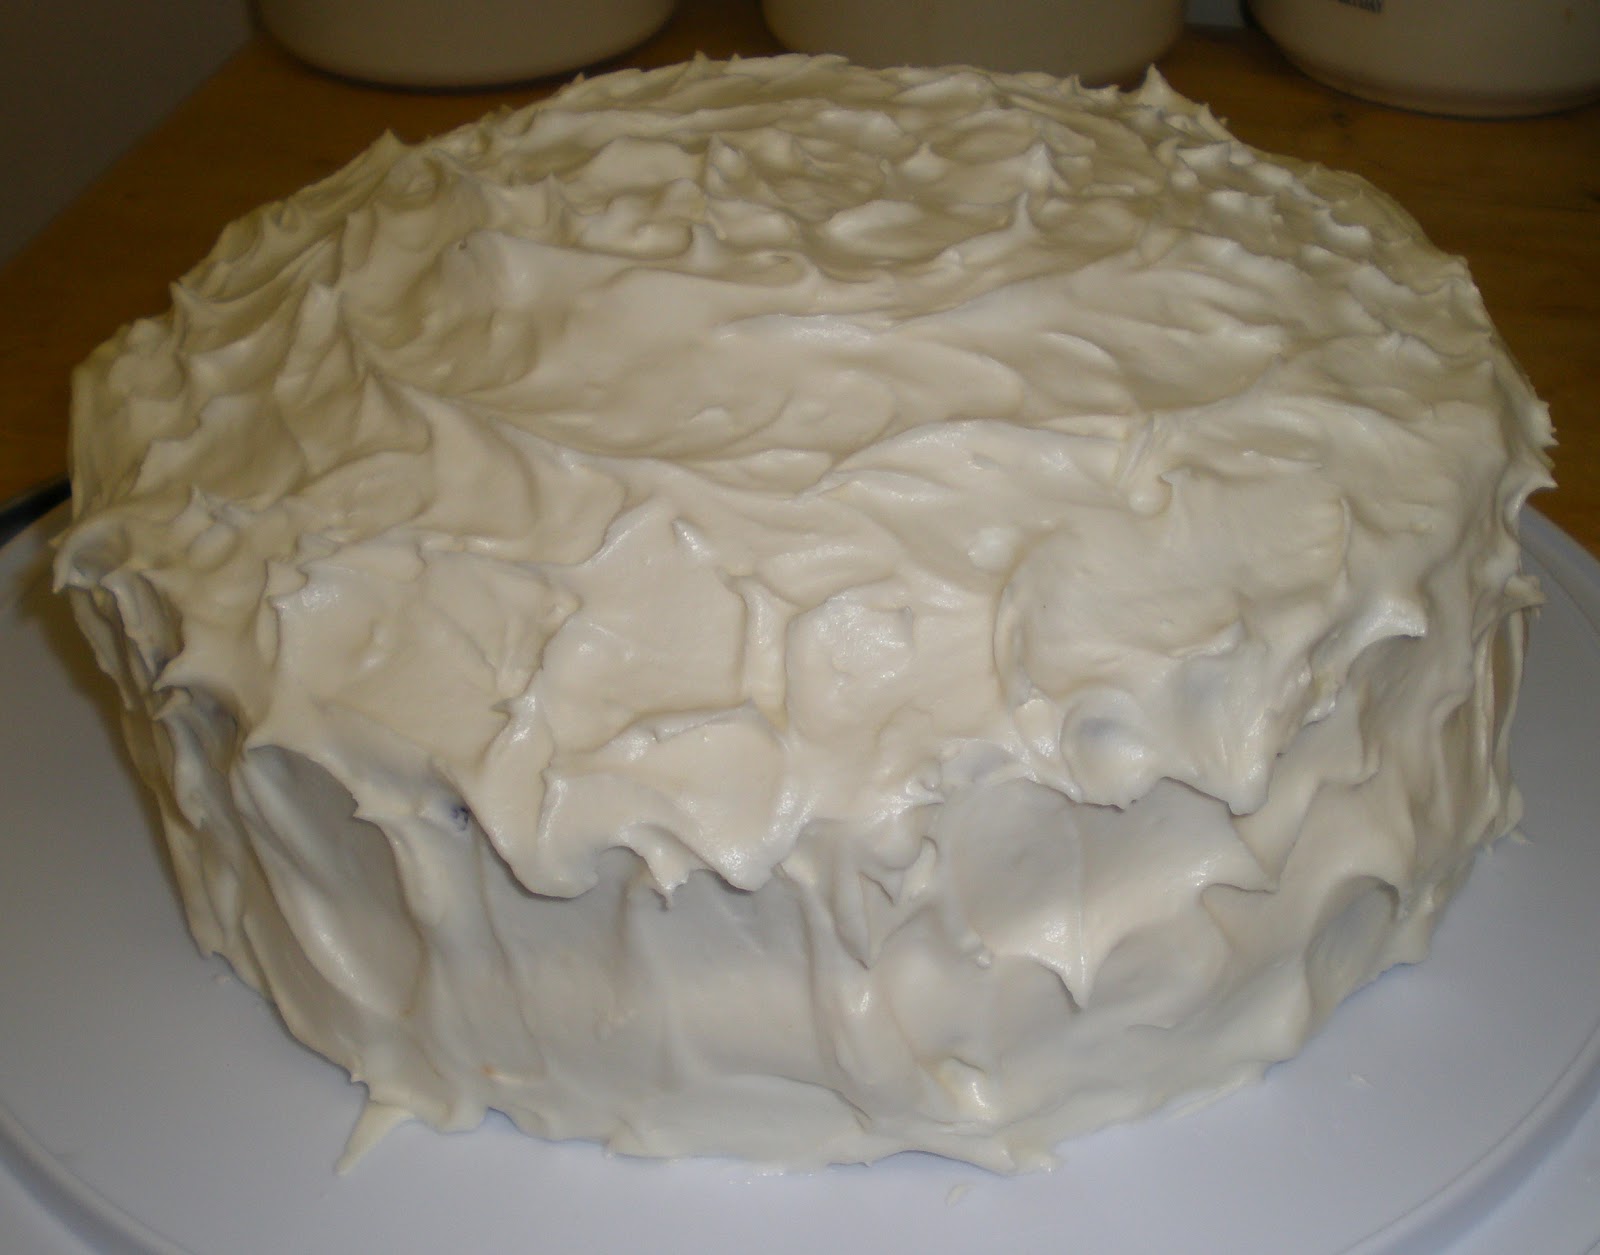
This Carrot Cake is sure damn good! I was afraid of the frosting melting so I stored it in the fridge. I don't know about you but I kinda like my cakes chilled. I love raisins and pecans, so this is my first time adding them in Carrot Cake. Boy was I missing out! The raisins are plump and kept the cake very moist. The pecans were also soft to the bite.


All over I'm in love with this recipe! Super moist and delicious. If you didn't know my favorite kind of cake is Carrot, maybe I should have said that from the beginning...Any who you have got to make this cake, that is if you love carrots like me.

This recipe I got from Sticky Gooey Creamy Chewy Blog. You can also find this recipe at Zoe Bakes site. It was adapted from The Essential Baker.

Ultimate Carrot Cake 
Source: adapted from The Essential Baker, Zoe Bakes via Sticky Gooey Creamy Chewy Blog

Ingredients:
2 1/4 cups all-purpose flour
1 1/2 teaspoons baking powder
1 teaspoon baking soda
1 teaspoon ground cinnamon
1/4 teaspoon ground ginger
1/2 teaspoon salt
1/4 teaspoon ground nutmeg
4 extra large eggs, at room temperature
1 1/2 cups sugar
1 cup canola oil
1/2 cup buttermilk
2/3 cups firmly packed brown sugar
2 teaspoons pure vanilla extract
1/2 cup crushed pineapple, drained
1 pound finely grated carrots
1 cup toasted chopped pecans
1 cup golden raisins
1 batch Cream Cheese Frosting (recipe follows)


Directions:

Preheat oven to 350 degrees F.

Prepare two 9-inch cake pans by lightly coating with oil and lining with parchment paper.

Whisk the flour, baking powder, baking soda, cinnamon, ginger, salt and nutmeg together in a bowl.  Set aside.

Mix the eggs, sugar, oil, buttermilk, brown sugar, vanilla, and pineapple together in a large bowl. Add the dry ingredients to the wet ingredients and mix until fully incorporated.   Stir in the carrots, pecans and raisins just until evenly distributed throughout the batter.

Pour the batter into the prepared pans and bake on the center rack for about 35-40 minutes, or until a toothpick or cake tester comes out clean.

Cool cakes in their pans for at least 30 minutes before attempting to remove them.  Then, removed from the pans and peel off the parchment paper.  Continue to cool the cakes completely before frosting.

To assemble the cake, place the bottom layer on a cardboard round or other flat surface and put on a cake turntable. Scoop about 1 1/2 cups of the cream cheese icing onto the top of the bottom cake layer.  Using an offset spatula, spread the frosting evenly over the surface.  Carefully place the second layer on top.  Scoop another 1 1/2 cups or so of the frosting on the top of the cake and spread evenly, easing the frosting down the sides.  Spread the icing around the sides of the cake, adding more as needed.  Lift the cake off the turn table and place on a cake stand or platter and chill a bit to firm up the frosting before slicing.


SGCC’S Favorite Cream Cheese Frosting

Ingredients:
16 ounces cream cheese, softened
4 ounces (1 stick) unsalted butter, softened
2 teaspoons pure vanilla extract
1 teaspoon orange extract
3-4 cups confectioners’ sugar to taste

Directions:

Beat cream cheese and butter together until smooth.  Add extracts and beat just until incorporated.  Beat in sugar, one cup at a time, until frosting has the flavor and consistency you want.  You may not need to add all of the sugar.

Sunday, April 1, 2012

Oatmeal Cream Pie


I remember as a kid my parents buying Little Deddie Oatmeal Cream Pies. I also remember really loving them. I still do!

via littledebbie.com
 But I don't buy them anymore, since I'm trying to watch my weight, but as I was checking out some food blogs I saw a recipe for Oatmeal Cream Pie on Shugary Sweets blog, so I just had to make them!

As you can see from the pictures these came out really good. They taste really yummy almost like Little Debbie's! The cookie is very chewy and sweet. Almost as chewy as Little Debbie's Oatmeal Creme Pies. Just be careful not to over bake these cookies, or they'll be to hard and crunchy. You don't want these cookies to come out that way. You want them soft and chewy as Little Debbie's Oatmeal Creme Pies! Nobody wants a crunchy cookies unless it meant to be! The cream in the center is very sticky and sweet. Together they make a great combination!

If you have kids this is a great treat for snack time or even better to surprise them for lunch! Even if you don't have kids just make them, they'll go fast!


Have fun making these sticky, yummy goodness!


Oatmeal Cream Pie
Yeild: 24 cream pies

Ingredients:

For the cookies:
1 cup margarine (Not Butter) or butter flavored Crisco (which I used)
3/4 cup brown sugar
1/2 cup granulated sugar
1 tbsp molasses
1tsp vanilla extract
2 eggs
1 1/2 cup flour
1/2 tsp salt
1 tsp baking soda
1/4 tsp cinnamon
1 1/2 cup quick oats

For the filling:
2 tsp very hot water
1/4 tsp salt
1 1/2 (7oz) jar of Marshmallow Fluff
3/4 cup butter flavor Crisco
2/3 cup powdered sugar
1 tsp vanilla extract
Directions:
Preheat oven to 350 degrees.

In a  large bowl, beat margarine or butter flavored Crisco, brown sugar, molasses, vanilla extract and eggs until combine. 

Add flour, salt, baking soda and cinnamon until combine.

Mix in the oats.

Drop by ONE tablespoon on to a parchment lined cookie sheet. Bake 8-10 minutes, until starting to brown around the edges. DON'T OVERCOOK!

After cookies have cooled, combine hot water with salt and mix until salt is dissolved. In a large bowl or stand mixer, beat Marshmallow Fluff with Crisco, powdered sugar and vanilla. Beat on high until fluffy. Add in salt water and mix until well combine.

Spread filling on one cookie and press second cookie on top.

Enjoy!

Sunday, March 25, 2012

Vanilla {or Funfetti} Cupcakes


It's been a while and I mean a long while since I baked cupcakes. It's not that I didn't have a good cupcake recipe, cause I have lots. It's cause I've been busy baking other yummy treats. I missed baking cupcakes so I'm glad I got in the kitchen today and baked up these Vanilla {or Funfetti} Cupcakes! 

This recipe is originally called Super-Duper Vanilla {or Funfetti} Cupcakes. I cut the name short because I didn't have any vanilla beans. (insert sad face here)


Not only has it been a while since I baked cupcakes but also with rainbow sprinkles. I love sprinkles so I was super excited when I found this recipe on Sweetapolita Blog. I'm in love with her blog and all her yummy creations! So very glad I've made this cupcake recipe!


The vanilla cake batter is really silky smooth and very moist. I added sprinkles in the batter which makes it even extra fun and oh so good. Once I let these cupcakes rest, I just couldn't hold myself back so I had to bite into one. So darn good! (minus the frosting!) Then after making the frosting and adding it to the cupcakes, I added more sprinkles to the tops of these babies. I had to finally have another one, once again. (added frosting and sprinkles!) So, so good! I' am not kidding this cupcake recipe is really delicious! 

This recipe made so many cupcakes that I don't know what to do with! You can cut this recipe in half if you don't wanna bake some many. (like me!) Guess I'll be having them for breakfast tomorrow morning...Let's be real, also for lunch and dinner! lol


Oh yeah! Look at all that goodness!

I didn't have any vanilla beans for the Vanilla Sugar. So I just used granulated sugar without the vanilla beans. They come out just as good but next time I make this I will make it the cake version with the vanilla beans.

In conclusion these Super-Duper Vanilla {or Funfetti} Cupcakes will leave you speechless and coming for more!

Super-Duper Vanilla {or Funfetti} Cupcakes
Source: sweetapolita.com
Yield: 24-28 standard cupcakes or two 8″ or 9″ round cake layers.
*If you are going with the cupcakes, you can always make 1/2 of this recipe, for 12-14 cupcakes.  

Ingredients
1 cup whole milk (237 mL/8 liquid ounces), at room temperature
4 large egg whites (4 ounces/120 grams), at room temperature
1 egg, whole, at room temperature
2 teaspoons (10 mL) pure vanilla extract
1/2 teaspoon (2.5 mL) almond extract
3 cups (12 oz/350 g) cake flour, sifted
1 1/2 cups vanilla sugar (10.5 ounces/300 grams)
1 tablespoon + 1 teaspoon baking powder (19.5 grams)
3/4 teaspoon salt (5 grams)
6 tablespoons (3 ounces/85 grams) unsalted butter, softened but cool, and cut into cubes
6 tablespoons (3 ounces/85 grams) vegetable shortening (I used Crisco)
1/2 cup Rainbow Jimmies or Confetti Quins


Directions
Preheat oven to 350°F (180°C). Prepare two standard muffin pans with your favourite baking liners and set aside.

In a medium bowl or measuring cup, combine and stir the egg whites, whole egg, 1/4 cup of milk, vanilla and the almond extract. Set aside.

In the bowl of an electric mixer fitted with the paddle attachment, combine the dry ingredients, including the vanilla sugar, together on low speed (I use the “stir” setting on my mixer) for 30 seconds.

Add the butter and shortening, and blend on low speed for about 30 seconds, then add remaining 3/4 cup of milk, and mix on low speed until just moistened. Increase to medium speed and mix for 1 1/2 minutes.

Scrape the sides of the bowl and begin to add the egg/milk mixture in 3 separate batches; beat on medium speed for 20 seconds after each addition. If you’re making Funfetti cupcakes, simply fold in the rainbow jimmies or confetti quins, until just combined.

Divide the batter into your prepared pans (I always use this cookie scoop for perfectly even cupcakes), no more than 2/3 full.

Bake until a toothpick comes clean when inserted into the center of the cupcake (about 16-18 minutes). Be so careful to not overbake.

Place hot baking pans on wire racks, then carefully (they’re hot!) remove the cupcakes from the baking pans immediately, to let cool.

Let cool completely before frosting.

Whipped Vanilla Frosting 
Yield: Enough to generously frost 12-14 standard cupcakes.

Ingredients
3 sticks + 2 tablespoons (375 grams/13 ounces) unsalted butter, softened and cut into cubes
3.5 cups (400 grams/14 oz) confectioners’ sugar, sifted
3 tablespoons (45 mL) milk
1 tablespoon (15 mL) pure vanilla extract
a pinch of salt
a medley of sprinkles for decorating

Directions
In the bowl of an electric mixer fitted with the paddle attachment, whip butter for 8 minutes on medium speed (I use "4" on my KitchenAid). Butter will become very pale & creamy.

Add remaining ingredients and mix on low speed for 1 minute, then on medium speed for 6 minutes. Frosting will be very light, creamy, and fluffy.

Best used right away (for ideal spreading consistency). To get frosting super smooth (no air bubbles), use a silicone spatula and in an aggressive side-to-side motion, pushing the frosting back and forth against the sides of the bowl. You will hear a sort of paddling sound. Do this every so often while you use the frosting–it keeps it super smooth.

Sunday, March 18, 2012

New York Times Chocolate Chip Cookies


Is your mouth watering? If not then what's wrong with you? lol You should be begging me for a cookie! But don't you worry, they'll be no begging cause like always the recipe will be below!

I though my Chewy Chocolate Chip Cookies Recipe were good but I found an even better chocolate chip cookie recipe! If your thinking of making this New York Times Chocolate Chip Cookies recipe than you better have the patience. For this recipe you have to wait 24 hours and up to 72 hours.


I love these cookies cause they are crispy around the edges and soft, chewy and buttery in the middle. I used a big ice cream scoop to make big cookies. One cookie was a enough to satisfy me. I used 60% cocoa and semi-sweet chocolate chip.


Just look at all that goodness! These cookies are so good that I'm planning on making them again.

Follow the instructions of this recipe and your cookies will come out delicious!


New York Times Chocolate Chip Cookies
Yield: 1 1/2 dozen 5-inch cookies.

Ingredients: 

2 cups minus 2 tbsp (8 1/2oz.) cake flour
1⅔ (8 1/2oz.) bread flour
1¼ tsp baking soda
1½ tsp baking powder
1½ tsp coarse salt
2½ (1 1/4cups) unsalted butter
1¼ cups (10oz.) light brown sugar
1 cup plus 2 tbsp (8oz.) granulated sugar
2 large eggs
2 tsp natural vanilla extract
1¼ pounds bittersweet chocolate discs or fèves, at least 60 percent cacao content (see note)
sea salt

Instructions:

Sift flours, baking soda, baking powder and salt into a bowl. Set aside.


Using a mixer fitted with paddle attachment, cream butter and sugars together until very light, about 5 minutes.


Add eggs, one at a time, mixing well after each addition. Stir in the vanilla.

Reduce speed to low, add dry ingredients and mix until just combined, 5 to 10 seconds.

Drop chocolate pieces in and incorporate them without breaking them.

Press plastic wrap against dough and refrigerate for 24 to 36 hours. Dough may be used in batches, and can be refrigerated for up to 72 hours.

When ready to bake, preheat oven to 350 degrees. Line a baking sheet with parchment paper or a nonstick baking mat. Set aside.

Scoop 6 3 1/2-ounce mounds of dough (the size of generous golf balls) onto baking sheet, making sure to turn horizontally any chocolate pieces that are poking up; it will make for a more attractive cookie.

Sprinkle lightly with sea salt and bake until golden brown but still soft, 18 to 20 minutes.
Transfer sheet to a wire rack for 10 minutes, then slip cookies onto another rack to cool a bit more.
Repeat with remaining dough, or reserve dough, refrigerated, for baking remaining batches the next day.

Eat warm, with a big napkin.

Notes: 

Make sure you bake these on the center rack of your oven.

Disks are sold at Jacques Torres Chocolate; Valrhona fèves, oval-shaped chocolate pieces, are at Whole Foods.

Tuesday, March 13, 2012

Lemon Sugar Crusted Blueberry Muffins


I'm a Blueberry lover so when I came upon a blog that had this Lemon Sugar Crusted Blueberry Muffins, I knew I had to make them. OMG I love this recipe! I have to say this was a so what hard recipe for me to follow but in the end I think I did a great job! I was super excited when they were done and I could finally eat one. I had like 3 yesterday and 1 this morning. Yeah I think I'm going to turn into a blueberry by tonight! By far (I'm not just saying this, I actually mean it!) the best Blueberry Muffin Recipe I've made!


This recipe has just enough blueberries for the top and the inside of this muffin. You use half the blueberries for a jam that goes on top of each muffin and to top that off you add the lemon crusted sugar, which makes for a very tasty crunchy top. Need I say more? 


 It's important not to over mix this batter, lumps are your friends! By not over mixing this will help make a very moist muffin. Using a rubber spatula you can gently fold the wet and dry ingredients together. 


Look at how moist this muffin is!

Best recipe by far!

Lemon Sugar Crusted Blueberry Muffins
 Source: modified from Cook's Illustrated, Carnaldish.com
Ingredients:
    Lemon-Sugar Topping
    ⅓ cup sugar (2 1/3 ounces)
    1½ teaspoons finely grated zest from 1 lemon
     
    Muffins
    2 cups fresh blueberries (about 10 ounces), picked over
    1 1/8 cups sugar (8 ounces) plus 1 teaspoon
    2½ cups unbleached all-purpose flour (12 1/2 ounces)
    2½ tsp baking powder
    1 tsp table salt
    2 large eggs
    1½ teaspoons finely grated zest from 1 lemon
    1 tbsp fresh squeezed lemon juice
    4 tbsp (1/2 stick) unsalted butter, melted and cooled slightly
    ¼ cup vegetable oil
    1 cup buttermilk (see note below)
    1½ tsp vanilla extract
Instructions:
 
For the topping:
Stir together sugar and lemon zest in small bowl until combined; set aside.
 
For the muffins:
Adjust oven rack to upper-middle position and heat oven to 425 degrees. Spray standard muffin tin with nonstick cooking spray. Bring 1 cup blueberries, 1 teaspoon sugar and ½ teaspoon of lemon zest to simmer in small saucepan over medium heat. Cook, mashing berries with spoon several times and stirring frequently, until berries have broken down and mixture is thickened and reduced to ¼ cup, about 6 minutes. Transfer to small bowl and cool to room temperature, 10 to 15 minutes. Soak 1 teaspoon of lemon zest into 1 tablespoon of lemon juice while the berries cool to room temperature, about 10 minutes.

Whisk flour, baking powder, and salt together in large bowl. Whisk remaining 1 1/8 cups sugar and eggs together in medium bowl until thick and homogeneous, about 45 seconds. Slowly whisk in butter and oil until combined. Strain the 1 teaspoon of lemon zest of most it's moisture and add to the mixture -- discard the lemon juice. Whisk in buttermilk and vanilla until combined. Using rubber spatula, fold egg mixture and remaining cup blueberries into flour mixture until just moistened. (Batter will be very lumpy with few spots of dry flour; do not overmix.)

Use ice cream scoop or large spoon to divide batter equally among prepared muffin cups (batter should completely fill cups and mound slightly). Spoon 1 teaspoon of cooked berry mixture into center of each mound of batter. Using chopstick or skewer, gently swirl berry filling into batter using figure-eight motion. Sprinkle lemon sugar evenly over muffins.

Bake until muffin tops are golden and just firm, 15 to 19 minutes, rotating muffin tin from front to back halfway through baking time. Cool muffins in muffin tin for 5 minutes, then transfer to wire rack and cool 5 minutes before serving.

Note: If buttermilk is unavailable, substitute ¾ cup plain whole-milk or low-fat yogurt thinned with ¼ cup milk (buttermilk has the better taste though). Store leftover muffins in an air-tight container for up to 2 days.

Thursday, March 8, 2012

Angel Food Cake with Vanilla Strawberries


This has been my second time baking an Angel Food Cake, and what I can say that it's still a bit hard for me to bake. But I pulled through! I think I did a pretty good job, cause I thought when I took this cake out the oven it was ruin! But as I let it rest and removed it from the tube pan, I was relieved that it came out good!


Angel Food Cake is a super light and delicious cake. One slice just wouldn't be enough. You would have to have another. The strawberries is a must-have for this recipe. If you prefer, you can add whip cream to each slice of this cake.


If your not so sure about making this cake, do your research first. So you can at least achieve a great cake. 

Good Luck!

Angel Food Cake with Vanilla Strawberries

Ingredients

1 3/4 cup granulated sugar
1/4 teaspoon salt
1 cup cake flour, sifted
12 large egg whites, at room temperature
1/3 cup warm water
1 teaspoon vanilla extract, or 1/4 teaspoon almond extract
1 1/2 teaspoons cream of tartar
1 pint fresh strawberries
2 to 4 teaspoons granulated sugar (depending on how sweet your berries are)
1/2 scraped vanilla bean

Directions

Place a rack in the center of the oven and preheat oven to 350 degrees F.

In the bowl of a food processor, fitted with the blade attachment, grind sugar for about 2 minutes. This will help create a super fine sugar that will be better absorbed into the egg whites.

Place half of the sugar in a small bowl.

In a large bowl, sift together the remaining sugar, salt, and cake flour.  Set aside.
In the bowl of an electric stand mixer, fitted with a whisk attachment, beat together the egg whites, water, extract, and cream of tartar medium speed.  If you’re worried that the cream of tartar is too chunky… don’t worry, it’ll smooth itself out.  Beat on medium high, gradually adding the sugar from the small bowl, until medium (not stiff) peaks form.  The meringue will hold a trail of the beaters through it, be glossy, and won’t be overly foamy.

Remove the bowl from the mixer and sift in one quarter of the flour and sugar mixture.  Fold with a spatula.  Try to avoid stirring the mixture too much.  Instead, sweep the egg whites from the bottom of the bowl to the top, incorporating the flour.  Add flour mixture in three more batches.  Fold until thoroughly combine, but don’t overmix or deflate the egg whites.

Spoon battering into an ungreased tube pan.  Ungreased in is important, as it will help the cake rise. 
The tube pan will be full.

Bake for 45 to 50 minutes, or until a skewer inserted in the cake comes out clean.  Remove cake from the oven and carefully invert upside down, propped up on a bottle.  This cake cools upside down.  Let rest for at least an hour before trying to remove from the pan.

Slice strawberries and mix with sugar and vanilla bean.  Let rest in the fridge to create juices while the cake cools.

As the cake cools, it will begin to pull away from the sides of the pan.  To remove from the pan, tap the pan with a butter knife, or carefully run a butter knife around the edges between the cake and the pan.

Serve with berries and cream.

Cake will last, well wrapped at room temperature, for up to 3 days.

Thursday, March 1, 2012

Blog Award & Nominations!

I was awarded the Liebster Blog Award from Brown Sugar's Blog!

Really happy and excited to be nominated for this blog award! So glad that there's people out that who appreciate blogs that are just starting out, who don't have many followers. 

I have nominated five blogs that also will be receiving this Award!

(Liebster means “Favorite, Beloved, Dearest”)

My 5 Nominations:


Rules:

1) Show Thanks to the Blogger who awarded you by linking back to her/his blog.

2) Pick 5 Blogs with less than 200 followers and let them know about your nomination by leaving a comment on their blog.

3) Post the award on your blog!

That's it!

Thank you for this award Brown Sugar!

Please check out these blogs! ^_^

Related Posts Plugin for WordPress, Blogger...