Sunday, June 10, 2012

Cornbread In Cast Iron Skillet


So ever since I bought a Cast Iron Skillet (from Amazon) I have been cooking with this baby non-stop! I've always wanted one and happy to finally get one! This Cast Iron Skillet is per-seasoned which I'm pretty happy about that! But if it has to be re-seasoned; I have all the instructions I need from lodgemfg.com.

Any who, I've always wanted to bake Cornbread on one and so glad I did! It was crispy on the edges. Taste really good with some extra butter melting on the top of this baby! So I added about a tablespoon or so to this Cornbread as it came out the oven.


Love Cornbread warm out the oven, I just couldn't wait for it to cool...lol Added some more butter to it again! I think I'm like Paula Deen when it comes to butter, I swear!

Got this recipe online at grouprecipes.com from thenewagecook. Crispness on this Cornbread is absolutely delicious! I'm looking forward to baking some more tasty treats on the Cast Iron Skillet!

If you don't own a Cast Iron Skillet then what is wrong with you? No just kidding if you don't have one you can always bake this in a 8 x 8 baking pan.
 
Enjoy!

Cornbread In Cast Iron Skillet
25 minutes to bake Serves: 8
Source: thenewagecook

Ingredients 

1/4 cup of Butter

1 cup of white or yellow cornmeal (I used ground yellow cornmeal)

1 cup of all-purpose flour or Bisquick or fresh ground whole wheat flour

1/4 cup of granulated white sugar

 4 tsp of baking powder

1/2 tsp of salt

1 cup of milk or buttermilk (I used coconut milk)

1 egg

1/4 cup of vegetable oil or olive oil

Directions 

Preheat oven to 425F.

Place the butter into a 10-inch heavy bottom ovenproof frying pan or cast iron skillet and heat in the oven until butter is melted.

NOTE- Heating the butter in the skillet until it's hot and melted before adding the batter, guarantees a desirable CRISPNESS on the outer edges of the bread.

While the pan is heating and the butter is melting, prepare your cornbread batter.

In a large mixing bowl, stir together the cornmeal, flour, sugar, baking powder, salt, buttermilk and egg until well blended- wire whisk if possible.

Pour batter into the HOT and buttery skillet (batter will sizzle), return to the oven and bake for 20 - 25 minutes until bread is golden brown and a toothpick or cake tester inserted into the center will come out clean.

Remove from oven and let cool on a wire rack for approximately 5 minutes.

Invert cornbread onto a large plate and cut into wedges.

Makes 6 - 8 cornbread wedges.

Notes: I used a 12-inch Cast Iron Skillet. This recipe calls for a 10-inch so 12-inch came out thinner.

Monday, June 4, 2012

Chocolate Chip Cookies


So I'm always on the hunt for some more delicious Chocolate Chip Cookies and I found another great recipe!

I was on Amazon a few days ago looking for some delicious baking books. I found this one book called Cookie Cravings: 30 All-Time Favorite Recipes. This is the Kindle Edition for $0.99! Only under a dollar, I had to order it, so I did! This book is by Maria Lichty. She has a blog called Two Peas and Their Pod.  There's a bunch of great recipe on there so check out her site!

So as I was saying I was looking for another great Chocolate Chip Cookie recipe and decided to make this one! She calls it "Our Favorite Chocolate Chip Cookies". I can now understand why this recipe is her favorite! It's super chewy and soft! I'm glad I didn't bake all the dough cause I would love to see how these cookies taste after 72 hours.

Once I made the recipe I refrigerated the dough for 24 hours! The dough can be chilled for 72 hours.

This is the cookie dough after being refrigerated for 24 hours. I didn't have a bigger cookie scoop then the 1 1/2 in. as you see in the above picture. So I just scooped some cookie dough out and added two scoops together, then rolled them into a ball. I did that so I could achieve a big cookie.

Here are the cookies after being removed from the oven. I left them on the pan for about 3 minutes and then transfer them to a cooling rack.

Here they are cooling. Don't they look so good? Don't be tempted to try one just yet, there hot! Wait until the cookies are completely cool. Once there cool try a piece, then maybe another! ^_~


Mmmm...look at that delicious cookie! Well I'm about to head to the kitchen and bake up some more! I also have another cookie recipe called New York Times Chocolate Chip Cookies, which are awesome! {recipe here!} Like always the recipe for these "Our Favorite Chocolate Chip Cookies" will be down below!

After 72 hours from being chilled in the refrigerator, these cookies came out some much better! It's more crispy around the edges and chewy in the center!

Let me know what's your favorite cookie recipe, so I can try them out!

Enjoy!


Our Favorite Chocolate Chip Cookies
Makes 20 large (4-inch) cookies // Bake Time: 12-14 minutes

2 1/2 cup all-purpose flour
2 cups cake flour
1 1/2 teaspoons baking powder
1 1/2 teaspoons baking soda
1 teaspoons sea salt
1 1/2 cups (3 sticks) unsalted butter, at room temperature
1 1/4 cups light brown sugar
1 cup granulated sugar
2 large eggs
3 teaspoons vanilla extract
2 cups semi-sweet chocolate chips
Sea salt, for sprinkling

1. In a large bowl, whisk together the all-purpose flour, cake flour, baking powder, baking soda, and sea salt. Set aside.

2. In the bowl of a stand mixer, beat the butter, brown sugar, and granulated sugar together until smooth and creamy, about 5 minutes. Add in the eggs, one at a time. Add in the vanilla extract and mix until combined.

3. With the mixer on low, slowly add the dry ingredients to the wet ingredients, about 1/2 cup flour mixture at a time. Mix until just combined. Stir in the chocolate chips.

4. Wrap the cookie dough in plastic wrap and chill for at least 24 hours. The dough can be chilled for 72 hours.

5. When ready to bake, preheat the oven to 350 degrees F. Line a large baking sheet with a Silpat baking mat or parchment paper. Take about 1/4 cup of cookie dough and roll into a large ball. Place cookie dough balls on the prepared baking sheet, about 3 inches apart. Sprinkle with sea salt. Bake cookies for 12-14 minutes, or until the cookies are slightly golden brown around the edges. Remove from the oven and let cookies cool on the baking sheet for 3 minutes. Transfer to a wire cooling rack and cool completely.

Friday, May 25, 2012

Cosmic Brownies


Have you guys ever had Little Debbie's Cosmic Brownies before? Well apparently this recipe's meant to taste like Little Debbie's. I've had a Cosmic Brownie by Little Debbie and I must say this does not taste exactly like them but not far from them! 

This Brownie recipe is very rich, almost too rich for me. But none the less It's really good! Just make sure to cut a small slice and pour your self a glass of milk with these babies. I don't know about you but I love my brownies chilled in the fridge. I'm not into a warm brownies!


I thought this recipe was fun and easy to follow. Give it a try if you like rich chocolate, ganache and sprinkles! 


Cosmic Brownies 
Source: adapted from Elle's New England Kitchen, une Gaminedans la Cuisine

Brownies
1 cup granulated sugar
2/3 cup brown sugar
3/4 cup (that's 1 1/2 sticks) unsalted butter, melted and slightly cooled
2 tablespoons milk (or cream) (used coconut milk)
2 large room temperature eggs
2 teaspoons vanilla extract
1 1/2 tsp espresso powder (didn't use)
1 1/3 cups all-purpose flour
3/4 cup unsweetened cocoa
1/2 teaspoon baking Powder
1/4 teaspoon salt

Ganache
1/2 cup heavy cream (coconut milk)
7 oz bittersweet chocolate, chopped (used semi-sweet & dark chocolate)
pinch of salt

Topping
mini stars (or anything tiny and edible that you have on hand)

Method
Preheat the oven to 350 F. Lightly spray or grease a foil-lined 9x13-inch baking pan; Set aside.

In a large mixing bowl, whisk together the sugars, melted butter, cream, eggs, vanilla, and espresso powder; Set aside.
In a separate bowl, combine the flour, cocoa, baking powder, and salt.
Using a large rubber spatula, or a wooden spoon, fold the dry ingredients into the wet until just combined.
Spread the batter into prepared pan.
Bake for 18-20 minutes, or until a thin knife inserted into the center comes out with only a few moist crumbs. (Try not to over-bake.)
Remove the brownies from the oven place the pan onto a cooling rack.

While the brownies are cooling, prepare the ganache.

For the ganache: Place the chopped chocolate into a large, heatproof bowl.
In a small saucepan, bring the cream to just a simmer. Pour the hot cream over the chocolate and sprinkle with salt. Allow the chocolate to sit in the hot cream for about 3-5 minutes. Use a small whisk or spatula to stir the chocolate into the cream until the mixture is smooth and the chocolate has melted.

Pour the ganache over the semi-cool brownies. Use a small knife or an off-set spatula to spread the ganache over the entire pan of brownies.
Immediately sprinkle the ganache with your decoration of choice.
Refrigerate the brownies until they are completely cool, and the ganache has set.

Use a hot knife to slice the brownies into squares. 

Sunday, May 13, 2012

Happy Mother's Day & Coconut Macaroons!


Happy Mother's Day to all the Mama's out there! & Happy Macaroon Day! Yes I know it's not National Coconut Macaroon Day, I just needed an excuse to bake them so I can eat them! haha 

These Coconut Macaroons are super tasty and easy to make. I just used the recipe that's on Baker's Angel Flake Coconut. It's right on the back of the bag. Really quick and easy, all you need is a few simple ingredient's to bake up these deliciously, moist babies. I used a medium size cookie scoop (1 1/2 Tbsp) and 1 5/8 Mini Baking Cups. Don't they look cute?


 I'm super happy to be spending this Mother's Day with my one and only Mama Bear, Love you! I know my Mom will love these, cause she just loves coconut as much as me!

Coconut Macaroons
Prep: 15 Minutes plus cooling
Makes about 3 dozen or 18 servings, 2 cookies each

Ingredients:
1 package (14 oz.) Baker's Angel Flake Coconut (5-1/3 cups)
2/3 cup sugar
6 Tbsp. flour
1/4 tsp. salt
4 egg whites
1 tsp. almond extract

Directions:
Mix coconut, sugar, flour and salt in large bowl. Stir in egg whites and almond extract until well blended. Drop by tablespoonfuls onto greased and floured cookie sheets.

Bake at 325 F for 20 minutes or until edges of cookies are golden brown. Immediately remove from cookie sheets to wire racks. Cool completely. 

Optional: 

Chocolate-Dipped Macaroons:
Prepare and bake cookies as directed; cool. Melt 1 pkg. (8 squares) Baker's Semi-Sweet Baking Chocolate as directed on package. Dip cookies halfway into chocolate; let excess chocolate dip off. Lat stand at room temperature or refrigerate on wax paper-lined tray 30 minutes or until chocolate is firm.

Monday, May 7, 2012

Fluffy Vanilla Cake with Whipped Vanilla Bean Frosting


To celebrate my mom's birthday this year, I decided to bake something simple but delicious. So where do I go to find really good cake recipes? Sweetapolita of course! This is my second time baking a recipe off her site. The first were Vanilla {or Funfetti} Cupcakes {recipe here}, which were awesome! So when I read the post on this Fluffy Vanilla Cake, I just had to bake it! Oh boy was I glad!


 I have to say this was a fairly easy recipe to follow. The cake baked in just 22 minutes. I was surprised by that. If your planning on making this recipe do keep watch on not over baking this cake. I used a timer and set it for 20 minutes (like she states on her post).

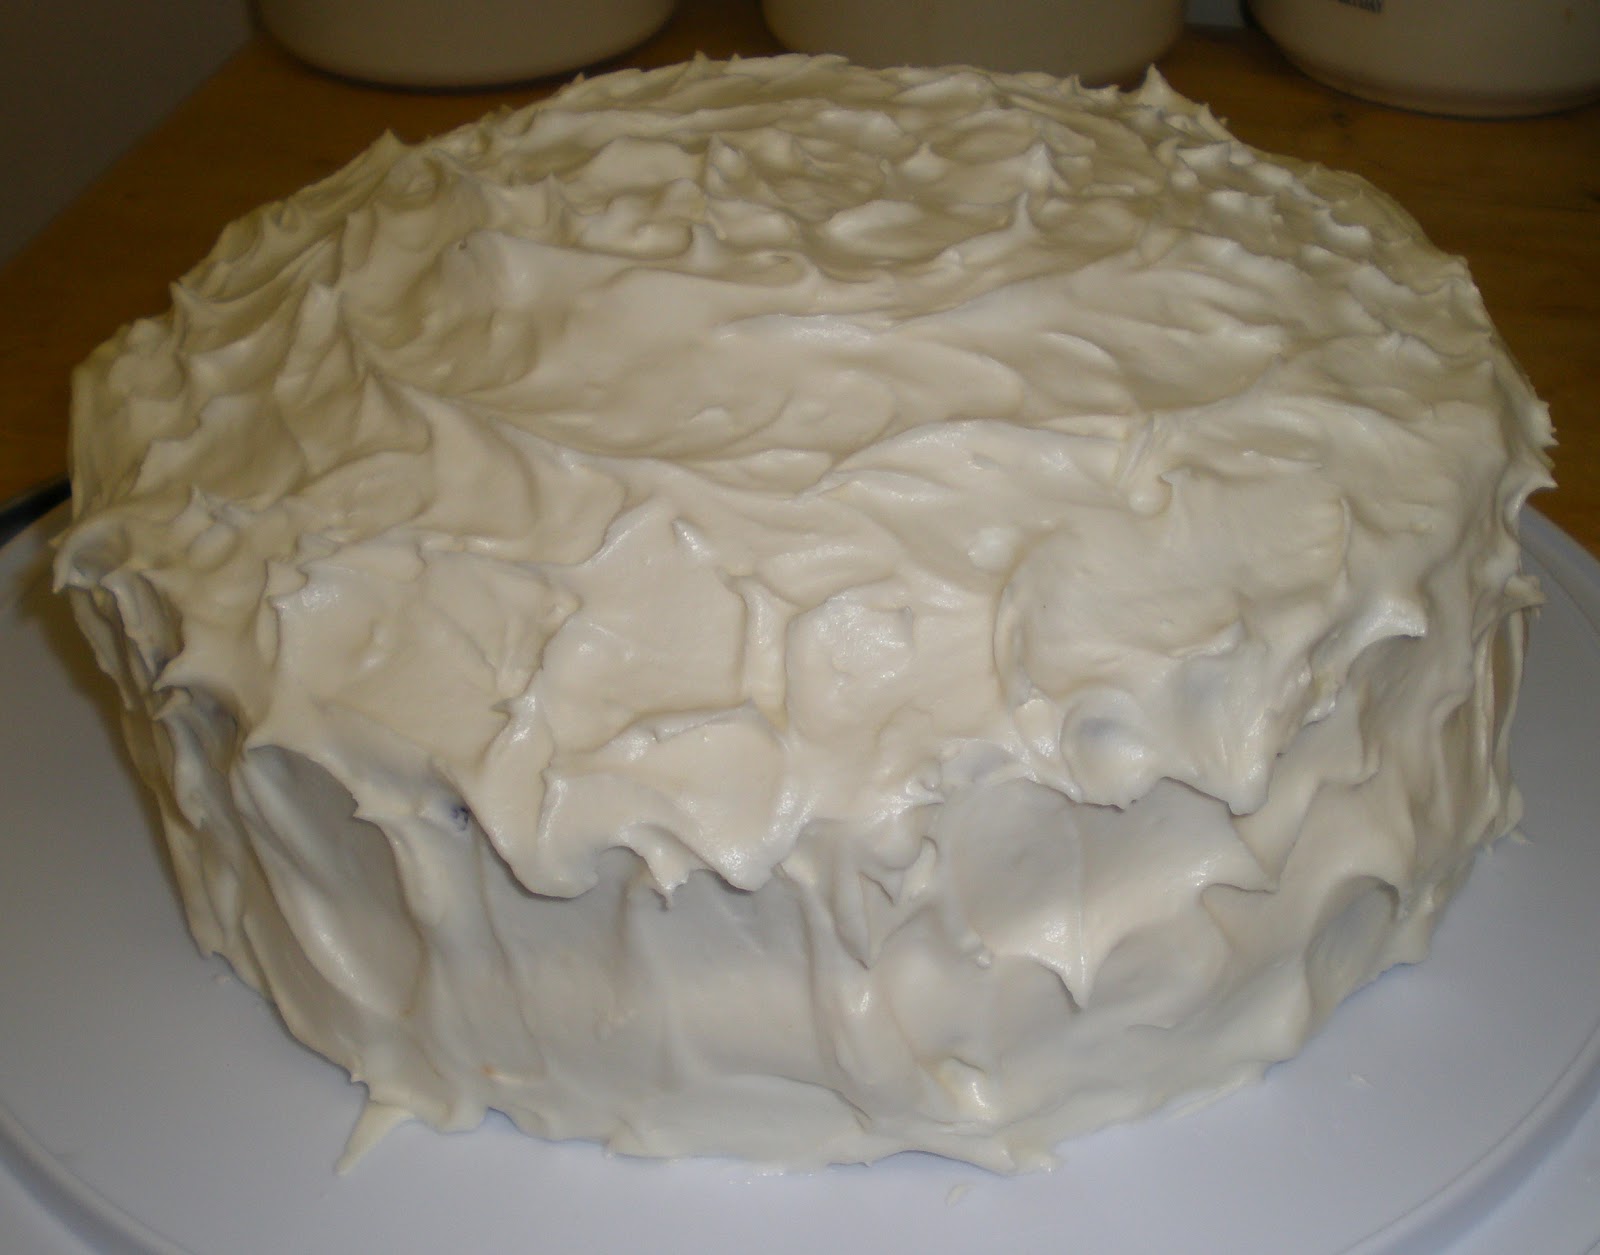
This is a very delicious, light and fluffy cake. The Whipped Vanilla Bean Frosting is oh so yummy! It's light but just sweet enough and the vanilla bean just makes it even better! You can make this frosting without the vanilla bean but I wanted the full experience, so I went and order some on Azamon {vanilla beans I used}. I used 9" Wilton Cake Pans. I also added candy pearls around the edges of this cake. Looks super pretty right?


Everyone who celebrated my mother's birthday with me really enjoyed this cake. Before you knew it, it was gone! I regretted not having a second piece but I'm planning on baking this recipe again for my boyfriends birthday, which is in a few days! Can't wait to have another piece yet again! ^_^

This is the yummiest Vanilla Cake I have ever had! Please visit Sweetapolita {recipe here} for a more in depth instructions on achieving this delicious cake and many others!

Enjoy!

Fluffy Vanilla Cake
Yield: One 2-layer, 8-inch round cake

Ingredients:
5 large egg whites (5 ounces/150 grams) at room temperature
3/4 cup whole milk (180 mL/6 liquid ounces), at room temperature
2 1/4 teaspoons pure vanilla extract (9 grams)
2 3/4 cups cake flour, sifted (11 ounces/315 grams)
1 3/4 cups sugar (12 ounces/350 grams)
1 tablespoon + 1 teaspoon baking powder (19.5 grams)
3/4 teaspoon salt (5 grams)
12 tablespoons unsalted butter (6 ounces/170 grams), at room temperature and cut into cubes

Directions:
Preheat oven to 350°F (180°C). Grease, line with parchment, and flour two round 8-inch pans.

In a medium bowl or measuring cup, combine and stir the egg whites, 1/4 cup of milk, and the vanilla. Set aside.

In the bowl of an electric mixer fitted with the paddle attachment, combine the dry ingredients together on low speed (I use the “stir” setting on my mixer) for 30 seconds.

Add the butter and remaining 1/2 cup of milk, and mix on low speed until just moistened. Increase to medium speed and mix for 1 1/2 minutes.

Scrape the sides of the bowl and begin to add the egg mixture in 3 separate batches; beat on medium speed for 20 seconds after each addition.

Divide the batter in two, spreading it evenly with a small offset palette knife. If you have a kitchen scale, weigh to ensure 2 even layers.

Bake 25-35 minutes or until a cake tester comes clean when inserted into the center. Be so careful to not over bake. Check cake at 20 minutes, but not before, and once you feel it’s almost ready, set the timer for 2 minute intervals. Let cool on racks for 10 minutes before loosening the sides with a small metal spatula, and invert onto greased wire racks. Gently turn cakes back up, so the tops are up and cool completely.

Wrap tightly and store at room temperature for up to 2 days, refrigerator for up to 5 days, or frozen for up to 2 months. Best eaten the same day as baked.

Whipped Vanilla Bean Frosting
Source: Sweetapolita & Adapted from Donna Hay

Ingredients:
3 sticks + 2 tablespoons (375 grams/13 ounces) unsalted butter, softened and cut into cubes
3 cups sifted (480 grams/1 lb + 1 ounce) confectioners’ sugar (icing, powdered)
3 tablespoons (45 mL) milk
1 vanilla bean, scraped
1 teaspoon (5 mL) pure vanilla extract
pinch of salt

Directions:
In the bowl of an electric mixer fitted with the paddle attachment, whip butter for 8 minutes on medium speed (I use “4″ on my KitchenAid). Butter will become very pale & creamy.

Add remaining ingredients and mix on low speed for 1 minute, then on medium speed for 6 minutes. Frosting will be very light, creamy, and fluffy.

Best used right away.

You can eliminate the vanilla bean and use a total of 1 1/2 teaspoons of pure vanilla extract.

Sunday, April 8, 2012

Happy Easter & Carrot Cake


Happy Easter! 

How are you enjoying your Easter Sunday? Oh me I'm just sitting here at home watching Being Human with a slice of Carrot Cake. Which I must say is really delicious. I had my share of Carrot Cakes and this is really, really good! I had a bit of trouble with the cream cheese frosting. It wasn't thick enough to my liking, so I started all over and this time it came out just right. It's not the pretties frosting technique but then again cream cheese frosting is always hard for me to work with.


This Carrot Cake is sure damn good! I was afraid of the frosting melting so I stored it in the fridge. I don't know about you but I kinda like my cakes chilled. I love raisins and pecans, so this is my first time adding them in Carrot Cake. Boy was I missing out! The raisins are plump and kept the cake very moist. The pecans were also soft to the bite.


All over I'm in love with this recipe! Super moist and delicious. If you didn't know my favorite kind of cake is Carrot, maybe I should have said that from the beginning...Any who you have got to make this cake, that is if you love carrots like me.

This recipe I got from Sticky Gooey Creamy Chewy Blog. You can also find this recipe at Zoe Bakes site. It was adapted from The Essential Baker.

Ultimate Carrot Cake 
Source: adapted from The Essential Baker, Zoe Bakes via Sticky Gooey Creamy Chewy Blog

Ingredients:
2 1/4 cups all-purpose flour
1 1/2 teaspoons baking powder
1 teaspoon baking soda
1 teaspoon ground cinnamon
1/4 teaspoon ground ginger
1/2 teaspoon salt
1/4 teaspoon ground nutmeg
4 extra large eggs, at room temperature
1 1/2 cups sugar
1 cup canola oil
1/2 cup buttermilk
2/3 cups firmly packed brown sugar
2 teaspoons pure vanilla extract
1/2 cup crushed pineapple, drained
1 pound finely grated carrots
1 cup toasted chopped pecans
1 cup golden raisins
1 batch Cream Cheese Frosting (recipe follows)


Directions:

Preheat oven to 350 degrees F.

Prepare two 9-inch cake pans by lightly coating with oil and lining with parchment paper.

Whisk the flour, baking powder, baking soda, cinnamon, ginger, salt and nutmeg together in a bowl.  Set aside.

Mix the eggs, sugar, oil, buttermilk, brown sugar, vanilla, and pineapple together in a large bowl. Add the dry ingredients to the wet ingredients and mix until fully incorporated.   Stir in the carrots, pecans and raisins just until evenly distributed throughout the batter.

Pour the batter into the prepared pans and bake on the center rack for about 35-40 minutes, or until a toothpick or cake tester comes out clean.

Cool cakes in their pans for at least 30 minutes before attempting to remove them.  Then, removed from the pans and peel off the parchment paper.  Continue to cool the cakes completely before frosting.

To assemble the cake, place the bottom layer on a cardboard round or other flat surface and put on a cake turntable. Scoop about 1 1/2 cups of the cream cheese icing onto the top of the bottom cake layer.  Using an offset spatula, spread the frosting evenly over the surface.  Carefully place the second layer on top.  Scoop another 1 1/2 cups or so of the frosting on the top of the cake and spread evenly, easing the frosting down the sides.  Spread the icing around the sides of the cake, adding more as needed.  Lift the cake off the turn table and place on a cake stand or platter and chill a bit to firm up the frosting before slicing.


SGCC’S Favorite Cream Cheese Frosting

Ingredients:
16 ounces cream cheese, softened
4 ounces (1 stick) unsalted butter, softened
2 teaspoons pure vanilla extract
1 teaspoon orange extract
3-4 cups confectioners’ sugar to taste

Directions:

Beat cream cheese and butter together until smooth.  Add extracts and beat just until incorporated.  Beat in sugar, one cup at a time, until frosting has the flavor and consistency you want.  You may not need to add all of the sugar.

Sunday, April 1, 2012

Oatmeal Cream Pie


I remember as a kid my parents buying Little Deddie Oatmeal Cream Pies. I also remember really loving them. I still do!

via littledebbie.com
 But I don't buy them anymore, since I'm trying to watch my weight, but as I was checking out some food blogs I saw a recipe for Oatmeal Cream Pie on Shugary Sweets blog, so I just had to make them!

As you can see from the pictures these came out really good. They taste really yummy almost like Little Debbie's! The cookie is very chewy and sweet. Almost as chewy as Little Debbie's Oatmeal Creme Pies. Just be careful not to over bake these cookies, or they'll be to hard and crunchy. You don't want these cookies to come out that way. You want them soft and chewy as Little Debbie's Oatmeal Creme Pies! Nobody wants a crunchy cookies unless it meant to be! The cream in the center is very sticky and sweet. Together they make a great combination!

If you have kids this is a great treat for snack time or even better to surprise them for lunch! Even if you don't have kids just make them, they'll go fast!


Have fun making these sticky, yummy goodness!


Oatmeal Cream Pie
Yeild: 24 cream pies

Ingredients:

For the cookies:
1 cup margarine (Not Butter) or butter flavored Crisco (which I used)
3/4 cup brown sugar
1/2 cup granulated sugar
1 tbsp molasses
1tsp vanilla extract
2 eggs
1 1/2 cup flour
1/2 tsp salt
1 tsp baking soda
1/4 tsp cinnamon
1 1/2 cup quick oats

For the filling:
2 tsp very hot water
1/4 tsp salt
1 1/2 (7oz) jar of Marshmallow Fluff
3/4 cup butter flavor Crisco
2/3 cup powdered sugar
1 tsp vanilla extract
Directions:
Preheat oven to 350 degrees.

In a  large bowl, beat margarine or butter flavored Crisco, brown sugar, molasses, vanilla extract and eggs until combine. 

Add flour, salt, baking soda and cinnamon until combine.

Mix in the oats.

Drop by ONE tablespoon on to a parchment lined cookie sheet. Bake 8-10 minutes, until starting to brown around the edges. DON'T OVERCOOK!

After cookies have cooled, combine hot water with salt and mix until salt is dissolved. In a large bowl or stand mixer, beat Marshmallow Fluff with Crisco, powdered sugar and vanilla. Beat on high until fluffy. Add in salt water and mix until well combine.

Spread filling on one cookie and press second cookie on top.

Enjoy!
Related Posts Plugin for WordPress, Blogger...